Realtime Texturing with Clip Studio Paint & Clip Studio Modeler
This one isn't mainly about Blender, however, if you own Clip Studio Paint, you can use an app that comes with Clip Studio to texture in (mostly) real-time.
There are many pros & cons to this method of texturing things. Which I'll list below:
Pros
- Easier to iterate on textures without reloading it repeatedly in Blender.
- Access to the complete tools of Clip Studio Paint when texturing, including but not limited to:
- Layers
- Brushes
- Image Materials
- Much more.
Cons
- Clip Studio Modeler does not have any other interface theme besides light mode (why??? Celsys please)
Besides being sore on the eyes, this also can heavily affect the way you color your textures due to color relativity.*
- Clip Studio Modeler can be janky to work with in some cases.
- You are not able to draw directly onto the model.
*You can use a large sphere with inverted normals to change the background color when texture painting.

While it isn't exactly a replacement for Substance or similar programs, it's great if you're unable to use them for one reason or another, or you prefer working in Clip Studio.
The Actual Guide
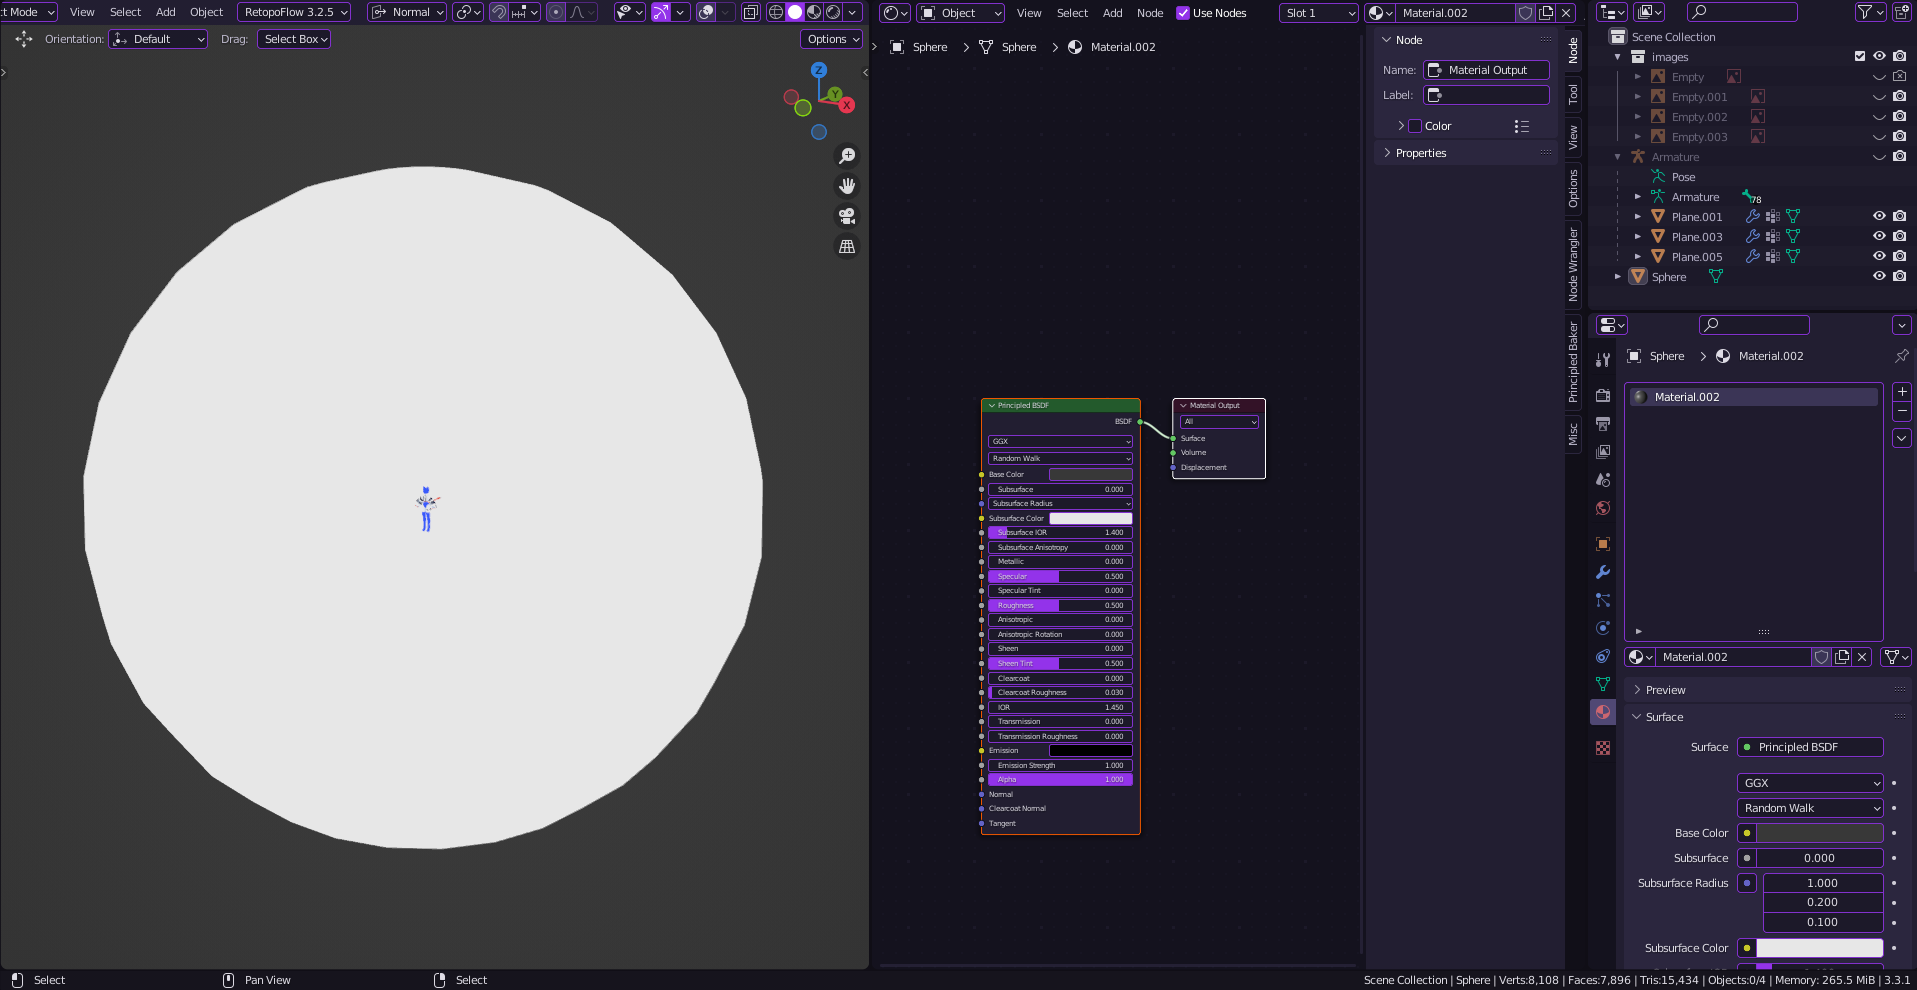
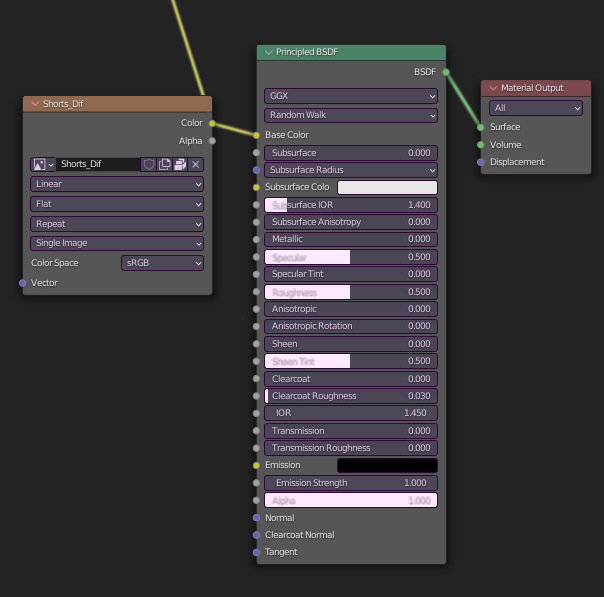
For this to work, you must have a particular material setup in Blender, Clip Studio Modeler is very picky about this. Luckily for us, it's just the default settings for new materials. You need the texture you're working on inputting into the Base Color of a Principled BSDF shader, this is important or CSModeler will NOT recognize your texture.
Once your materials have been set up properly, you can export the mesh into a folder.
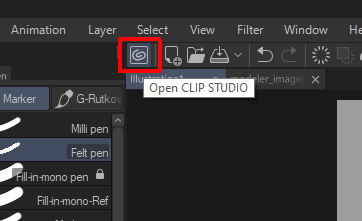
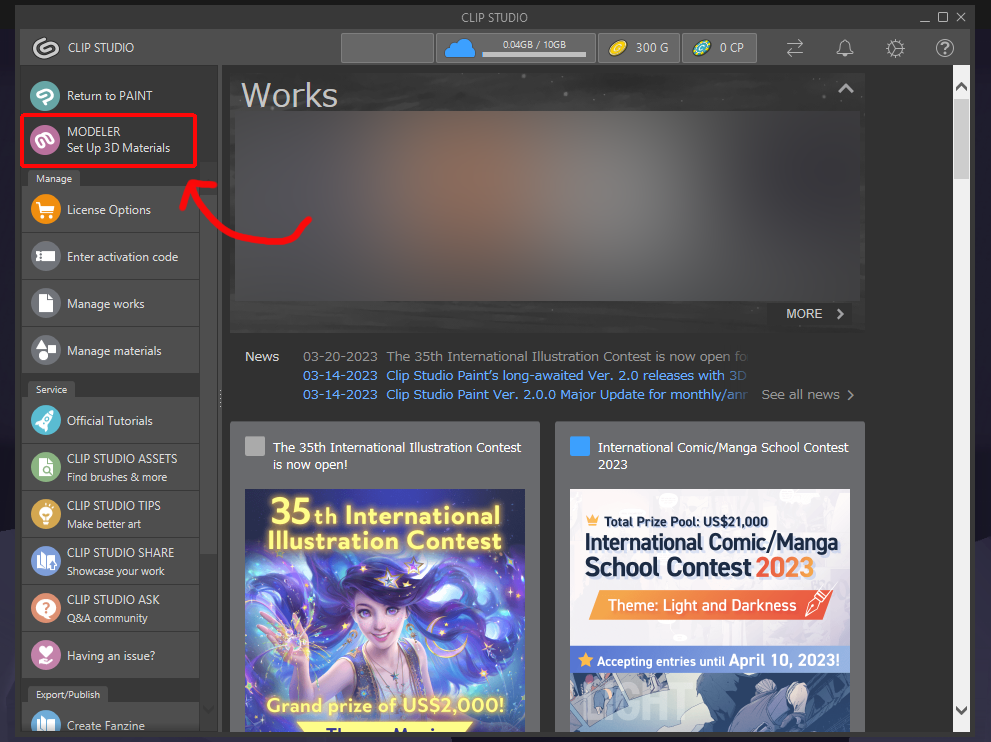
Now let's open Clip Studio Modeler, you can open CSModeler by clicking the "Open Clip Studio" button in the top left of Clip Studio Paint
Once the Clip Studio window opens, click "MODELER" in the top left corner. If this option does not show up, you may need to download the program from Clip Studio's website first.
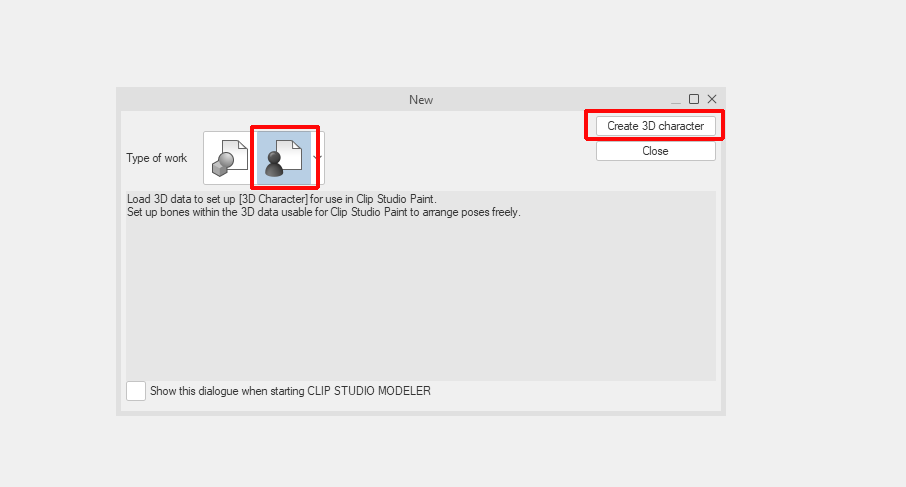
Once CSModeler opens, select "3D Character" and then click "Create 3D character"
Even if your model is not a character/avatar or such, select 3D Character anyway, as otherwise you will not be able to use the realtime texturing.
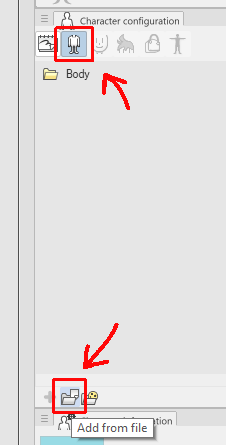
Once you've created the 3D Character file, on the right set of panels under the Character configuration window, click the "Body" tab on the top, and then click "Add from file" at the bottom, select your model from the file explorer prompt to open it.
Your model should now show up in the main viewport, it should have its texture applied to it from Blender, if it is untextured, make sure you followed every step and that your texture is saved externally outside of the .blend file.
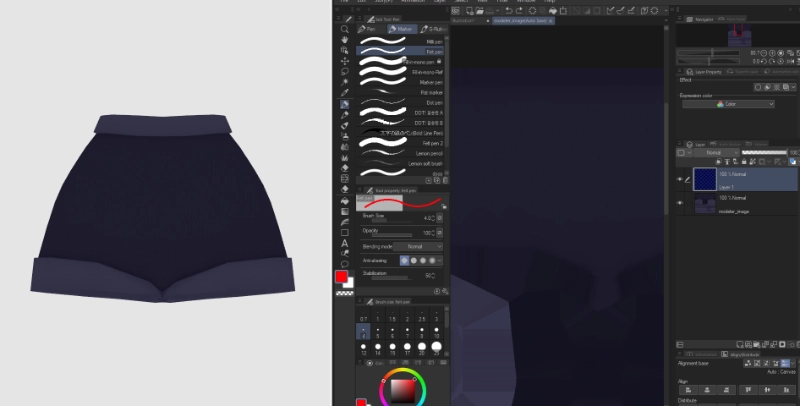
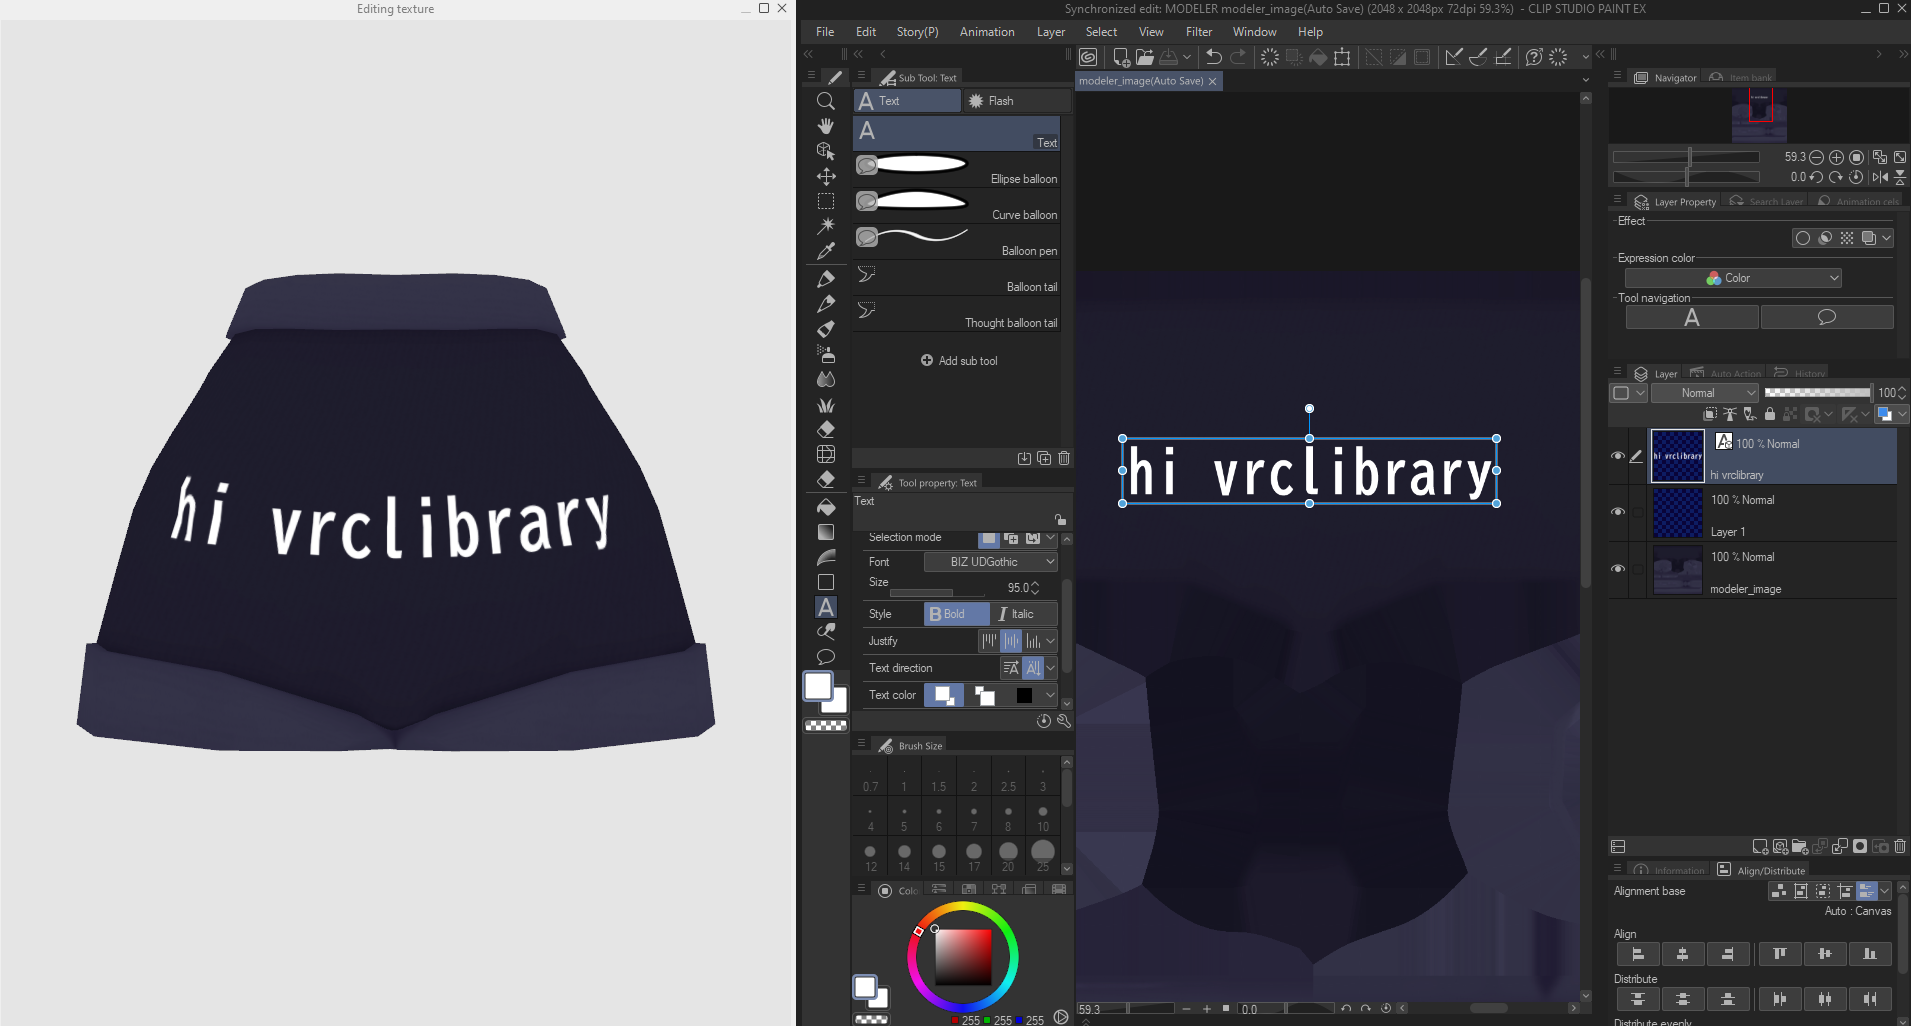
Once your model is loaded and ready, open the folders in the Body tab, and go to the "Surface material information" folder and select the texture you wish to edit, then click the "Edit with PAINT" button at the very bottom of the screen under the "Character information" window.

A new window called "Editing Texture" will now open and the texture will also open in CSPaint, you can now texture it however you wish as you would with any other image in CSPaint! Make sure to remember to save when you're done. I'd recommend putting the Editing Texture window on a second monitor if you have one.
No Comments