Normals: Data Transfer Normals for Cel-Shading
Ever wondered how to get good looking shadows on your anime face? Well, look no further!
This is the "lazy" way of doing this. Doing it manually can look better, but it's good to use this as a basis if you plan to do it manually!

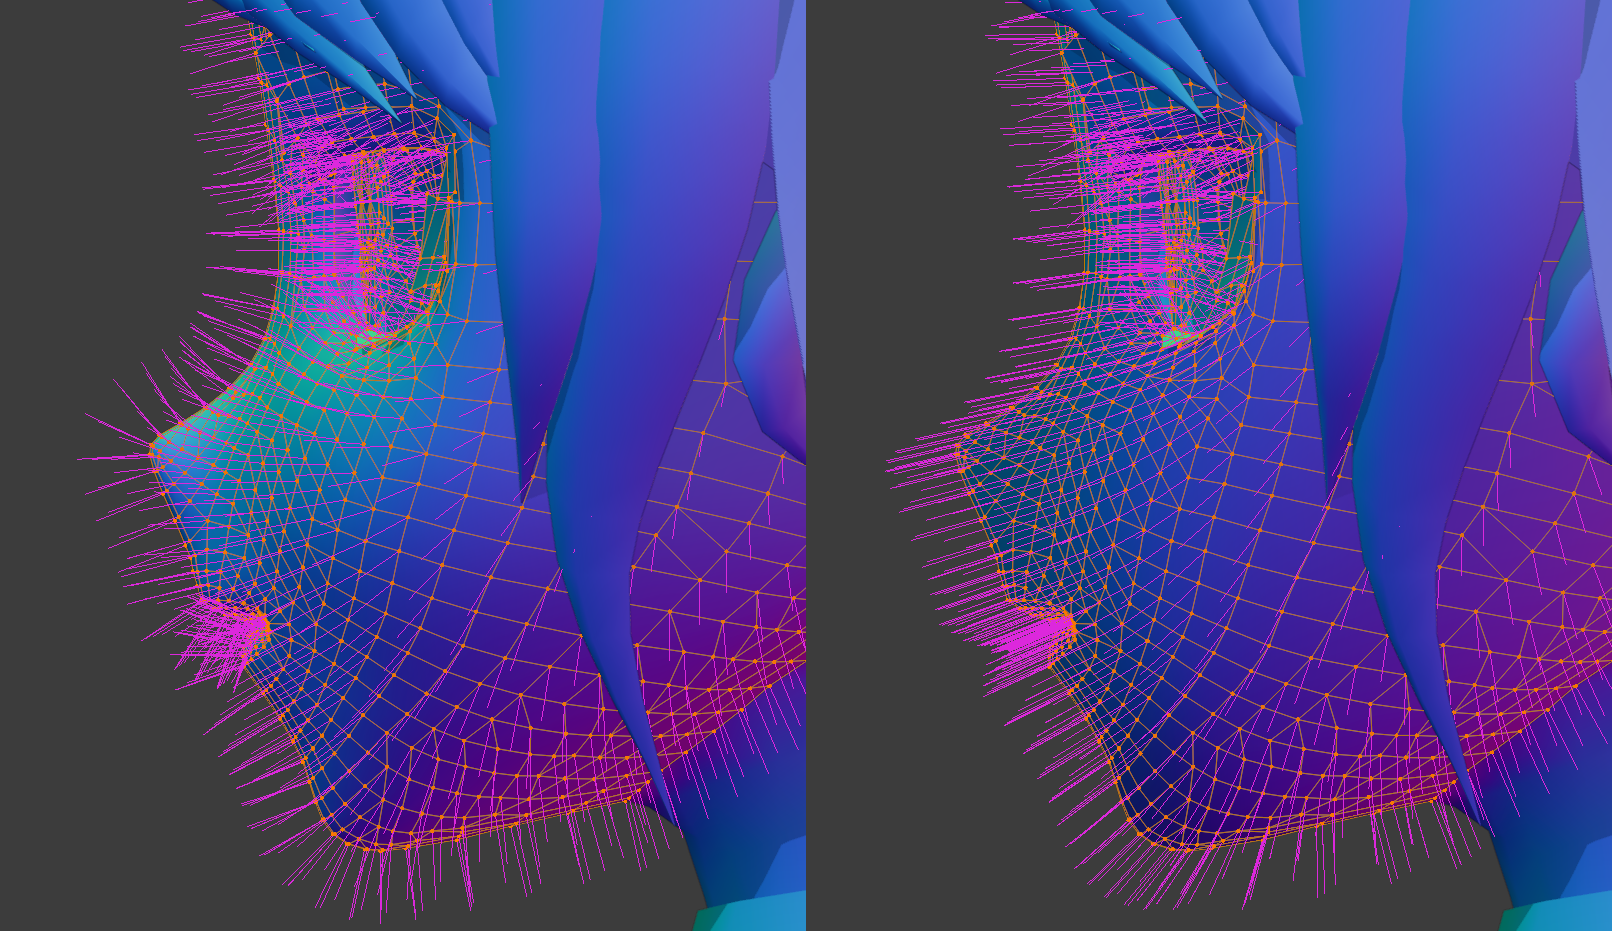
In 3D models, shadows are controlled by a mystical system called "normals" basically, each vert has a direction it points that tells it how shadows should look when cast on it. Below, we can see the normal directions of the top two models. The pink lines indicate where the shadows will "connect" if that makes sense?
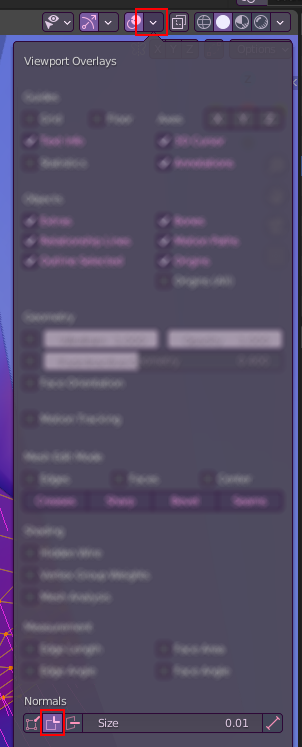
You can view the normals on your model via the following settings shown before.
The Actual Meat of This Page
So how do we make our shadows look a bit nicer?
Firstly you'll want to use a matcap such as the one I've been using to see how your normals will look, I suggest playing around with it as you go along so you can get it exactly right!

Step 1. Make a Cube, Give it a Subdivision Modifier
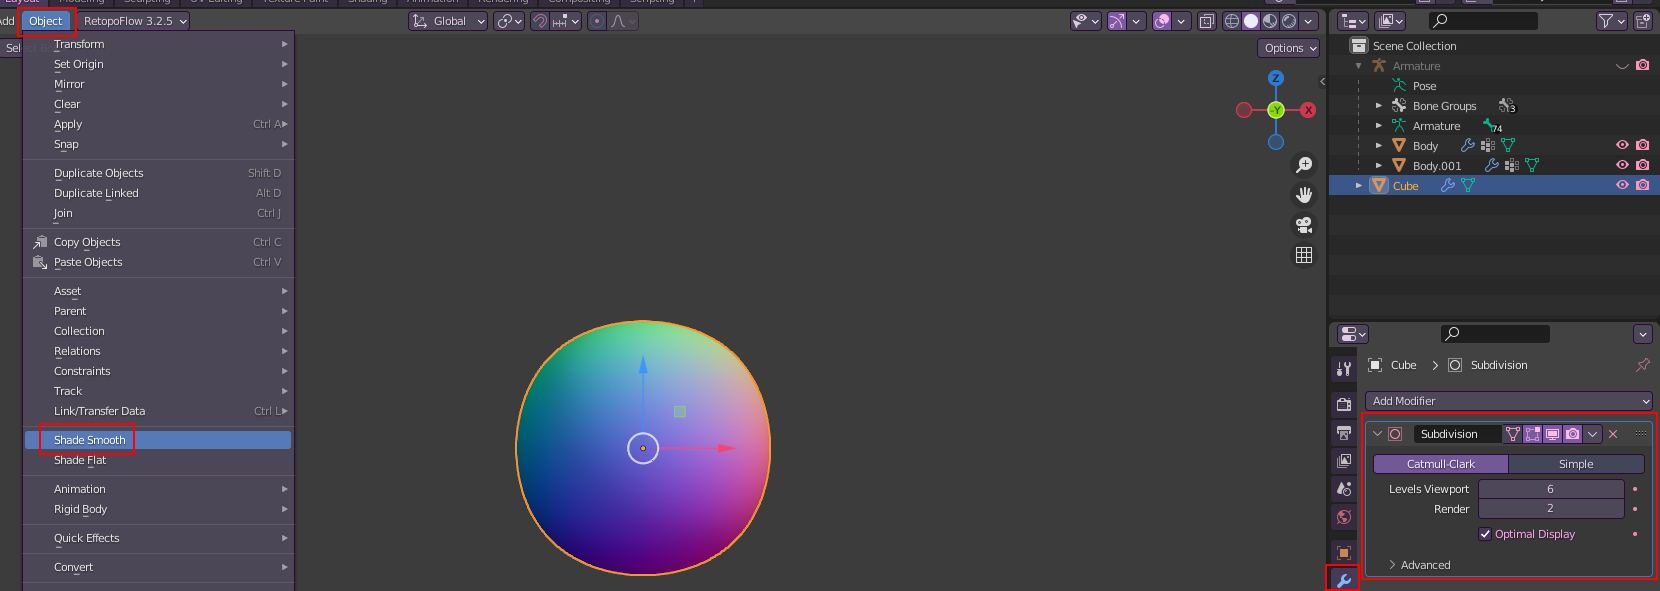
This is what we'll be using to project our shadows onto our model.

Place it over the mesh you will be adjusting the normals of, in this case, the head! Make sure it completely encompasses it.
Step 2. Add a Data Transfer Modifier to Your Mesh
You can hide your "Cube" for this step, don't delete it yet!
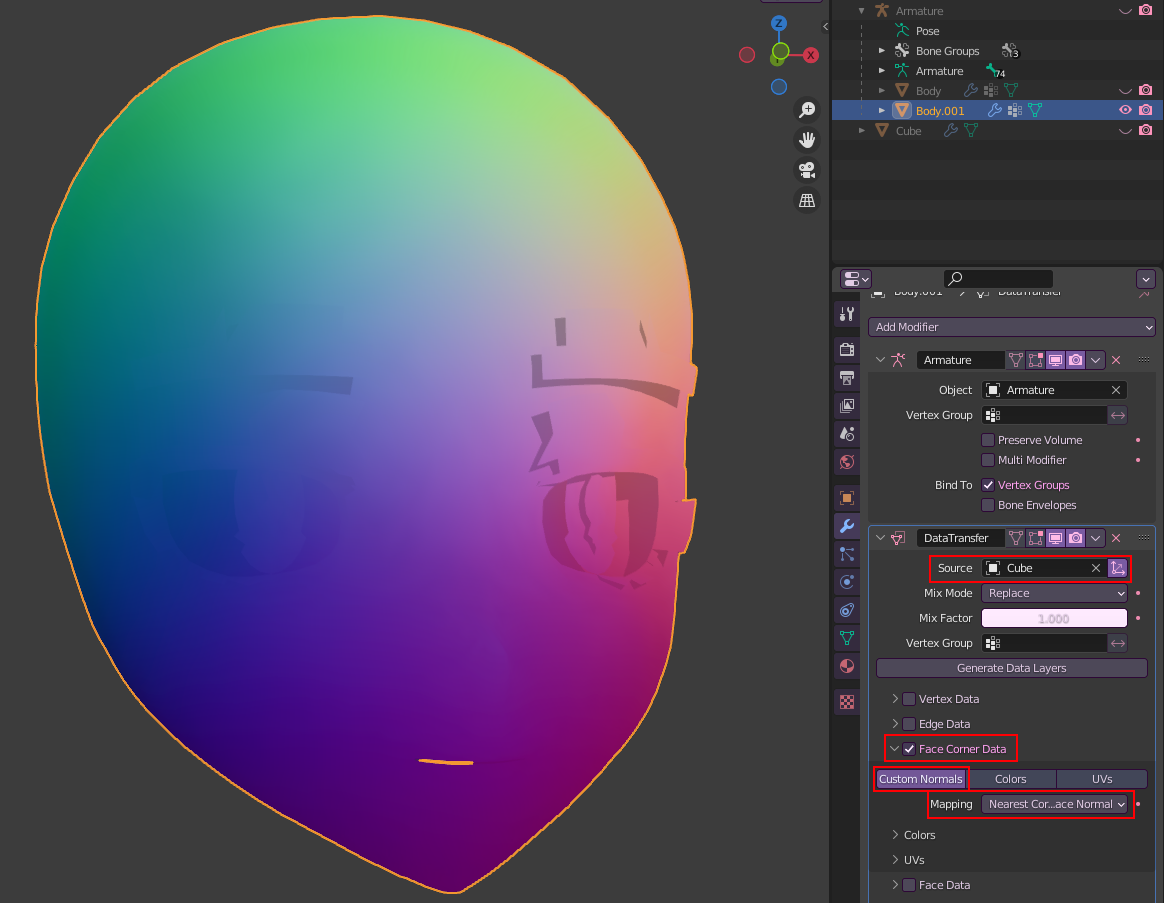
Add your "Cube" as your Source, then turn on Face Corner Data then click Custom Normals then change Mapping to Nearest Corner and Best Matching Face Normal
As you can see, our face is looking a bit odd! This has adjusted how our shadows will look. I personally find this to be a bit much though, so I often mess with the Mix Factor to get a balance of smooth and defines the lines of the face.
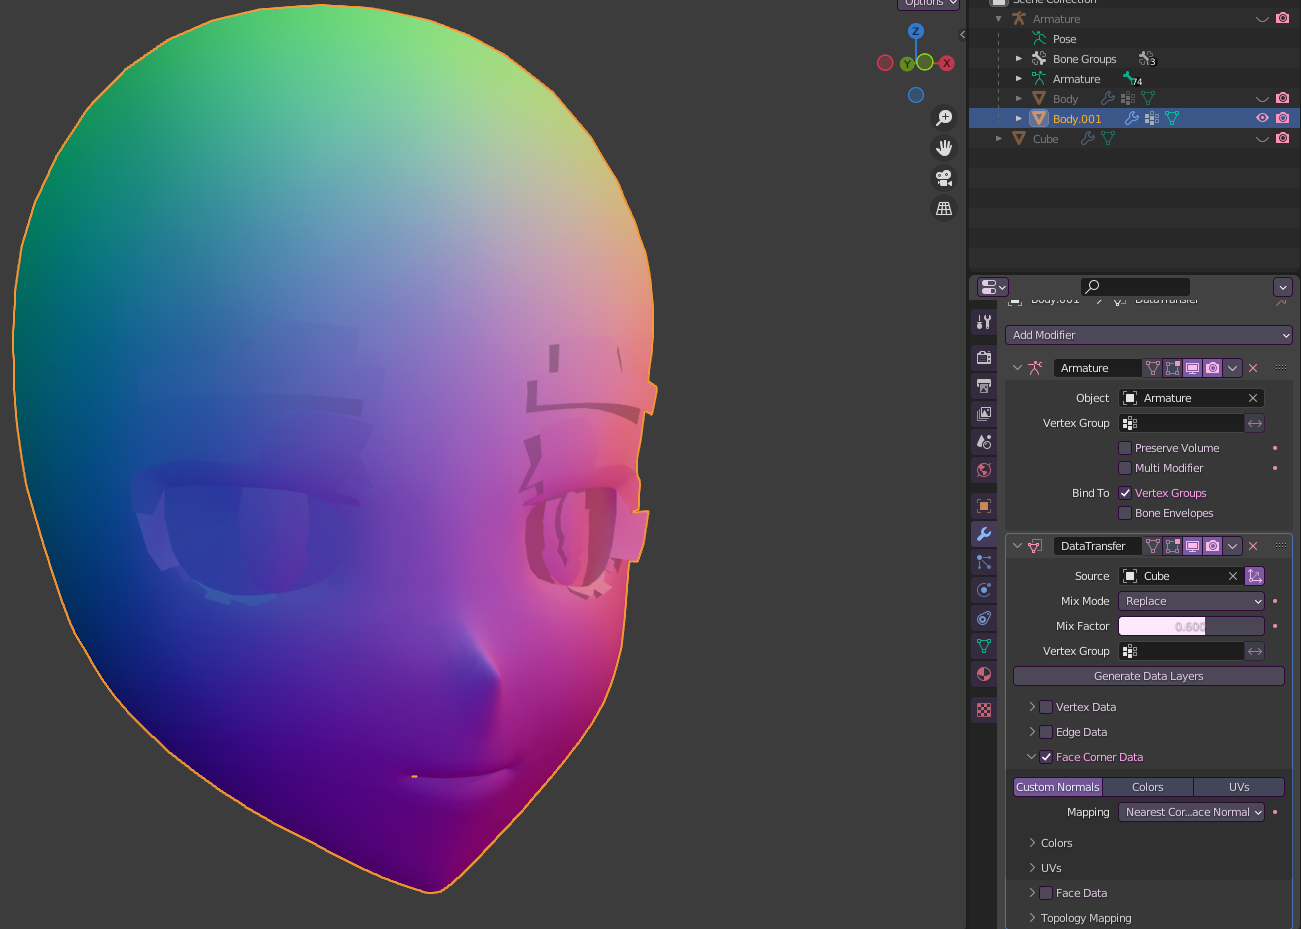
I often go for 0.6-0.8 for mixing, it gives a good balance between the smoothness I'm looking for while keeping defining features such as the mouth and nose.
Step 3. Apply the Modifier and Export!
MAKE SURE YOU DELETE THE CUBE! OR YOU MAY ACCIDENTALLY EXPORT IT WITH THE MODEL AND HAVE AN EXTRA 49,152 TRIS!

Tada! Look how much better that looks! You can use this for more than just faces too! I use it for hair as well for a smoother look, I adjust and extrude the cube so that it fits the entire hair mesh, then do the same thing.
No Comments