How to set up reflection probes
Reflection probes capture an image of their surroundings into a texture. This means a few things
- A higher resolution probe is much sharper, but much much bigger, due to containing six textures.
- The texture is static. It can't change. It won't be updated if the surroundings change.
- They can only represent a single perspective, which is shifted around to give the illusion of depth.
- Despite all this, nobody's going to notice an inaccurate probe if it roughly fits the lighting of the area.
So, here's my method for determining how to place probes in a scene.
1. Basic reflection probe
Even if you don't have a reflection probe, Unity will capture the skybox material into a reflection probe and hand it out. This reflection probe is given to everything by default.
Is the Unity skybox really representative of your scene? It probably isn't, so let's change that to something we set ourselves.
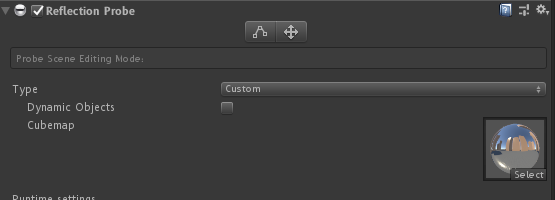
First, add a new Reflection Probe. Set the Type to "Custom".
- If you've marked all the objects in your scene as static, don't turn Dynamic Objects on.
- If you haven't marked your scene as static (because you haven't merged it, or can't use static batching) turn Dynamic Objects on. Then select Bake at the bottom and place your Reflection Probe texture somewhere relevant to your scene.
Second, open the Lighting window from the Windows menu at the top. From there, set Environment Reflections to Custom, and drag your new probe in.
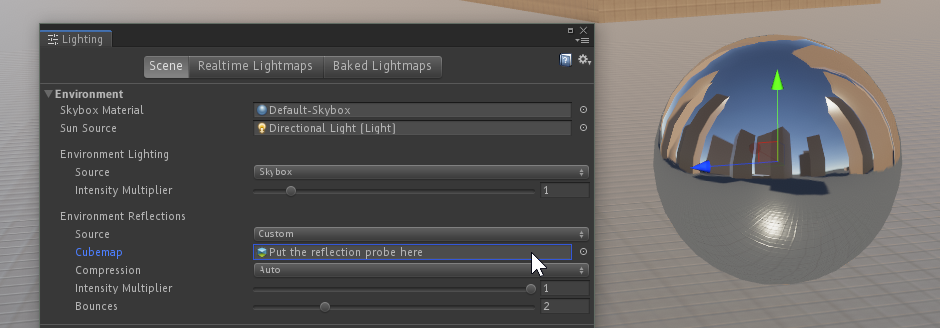
After doing this, you can disable the original probe. Now your scene has a default reflection that won't affect batching.
2. Complex reflection probes
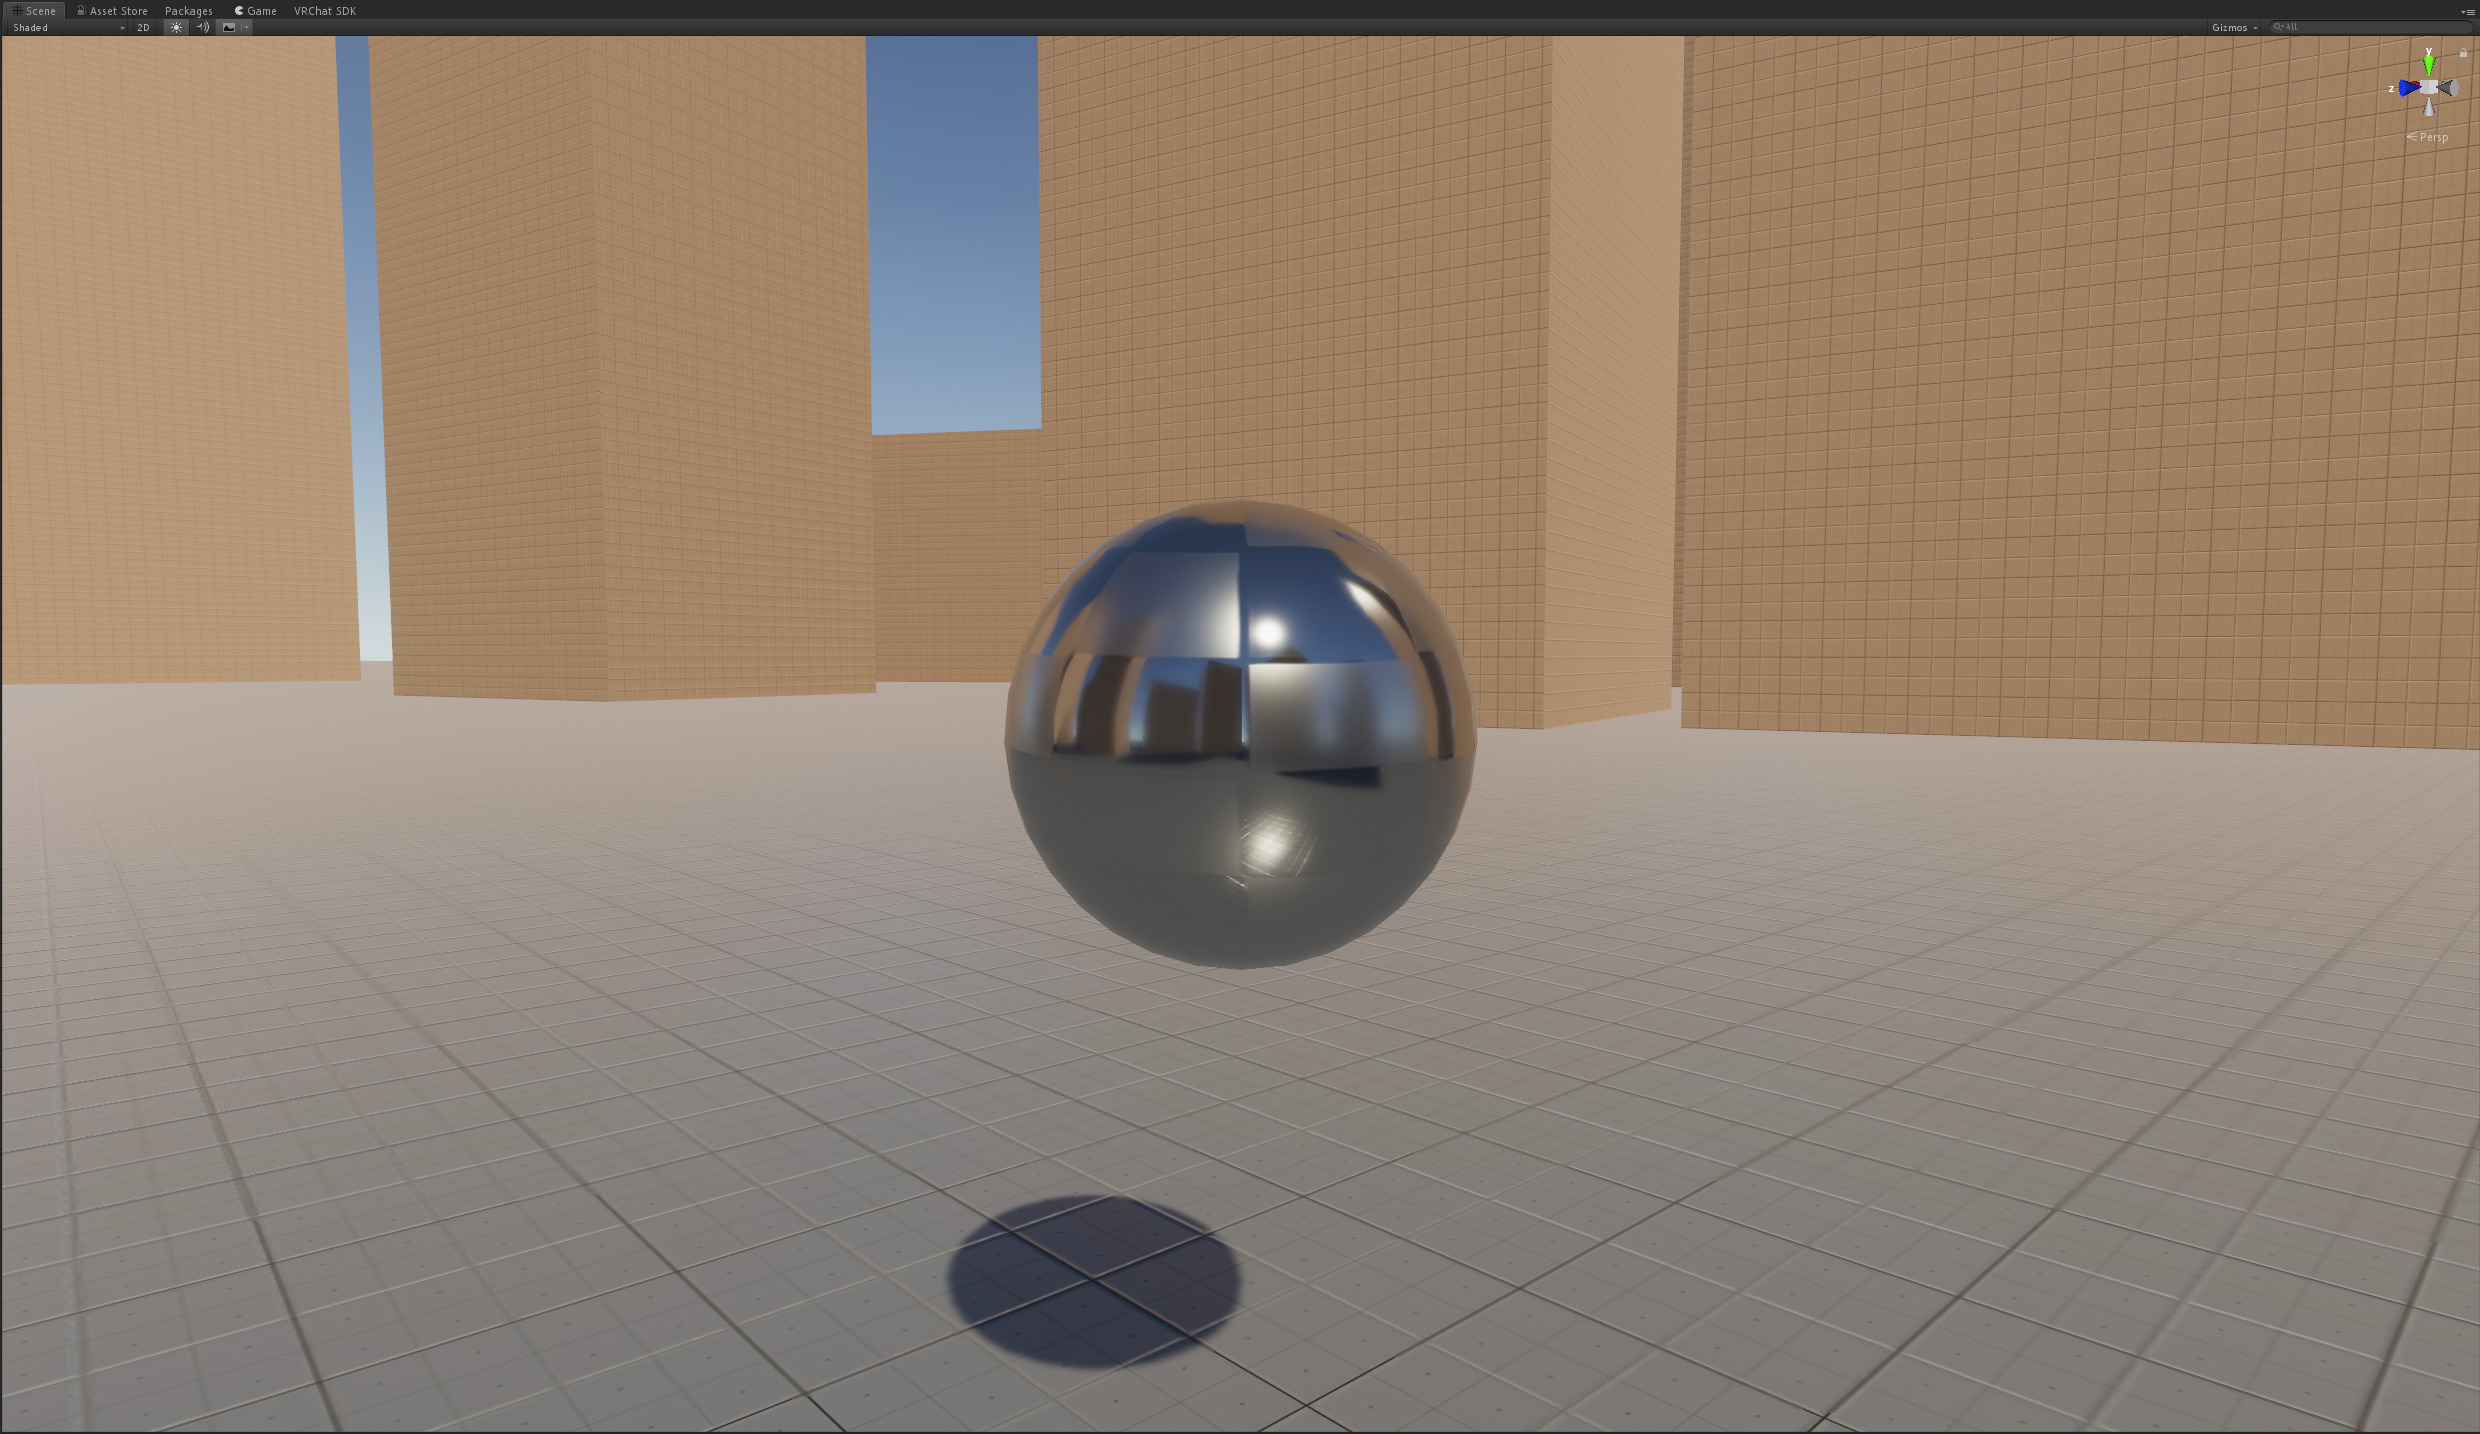
One obvious problem with this is that there are places where your reflections will look wrong. Normally, this isn't a problem. If your reflections match the colour and shading of the area around them, they don't need to be totally accurate. But when the difference is too big, it can stand out in a bad way.
This isn't a worst case scenario, but it's pretty obvious that things being reflected aren't there. It's extra worse on the sphere in the room, because it doesn't reflect the walls around it.
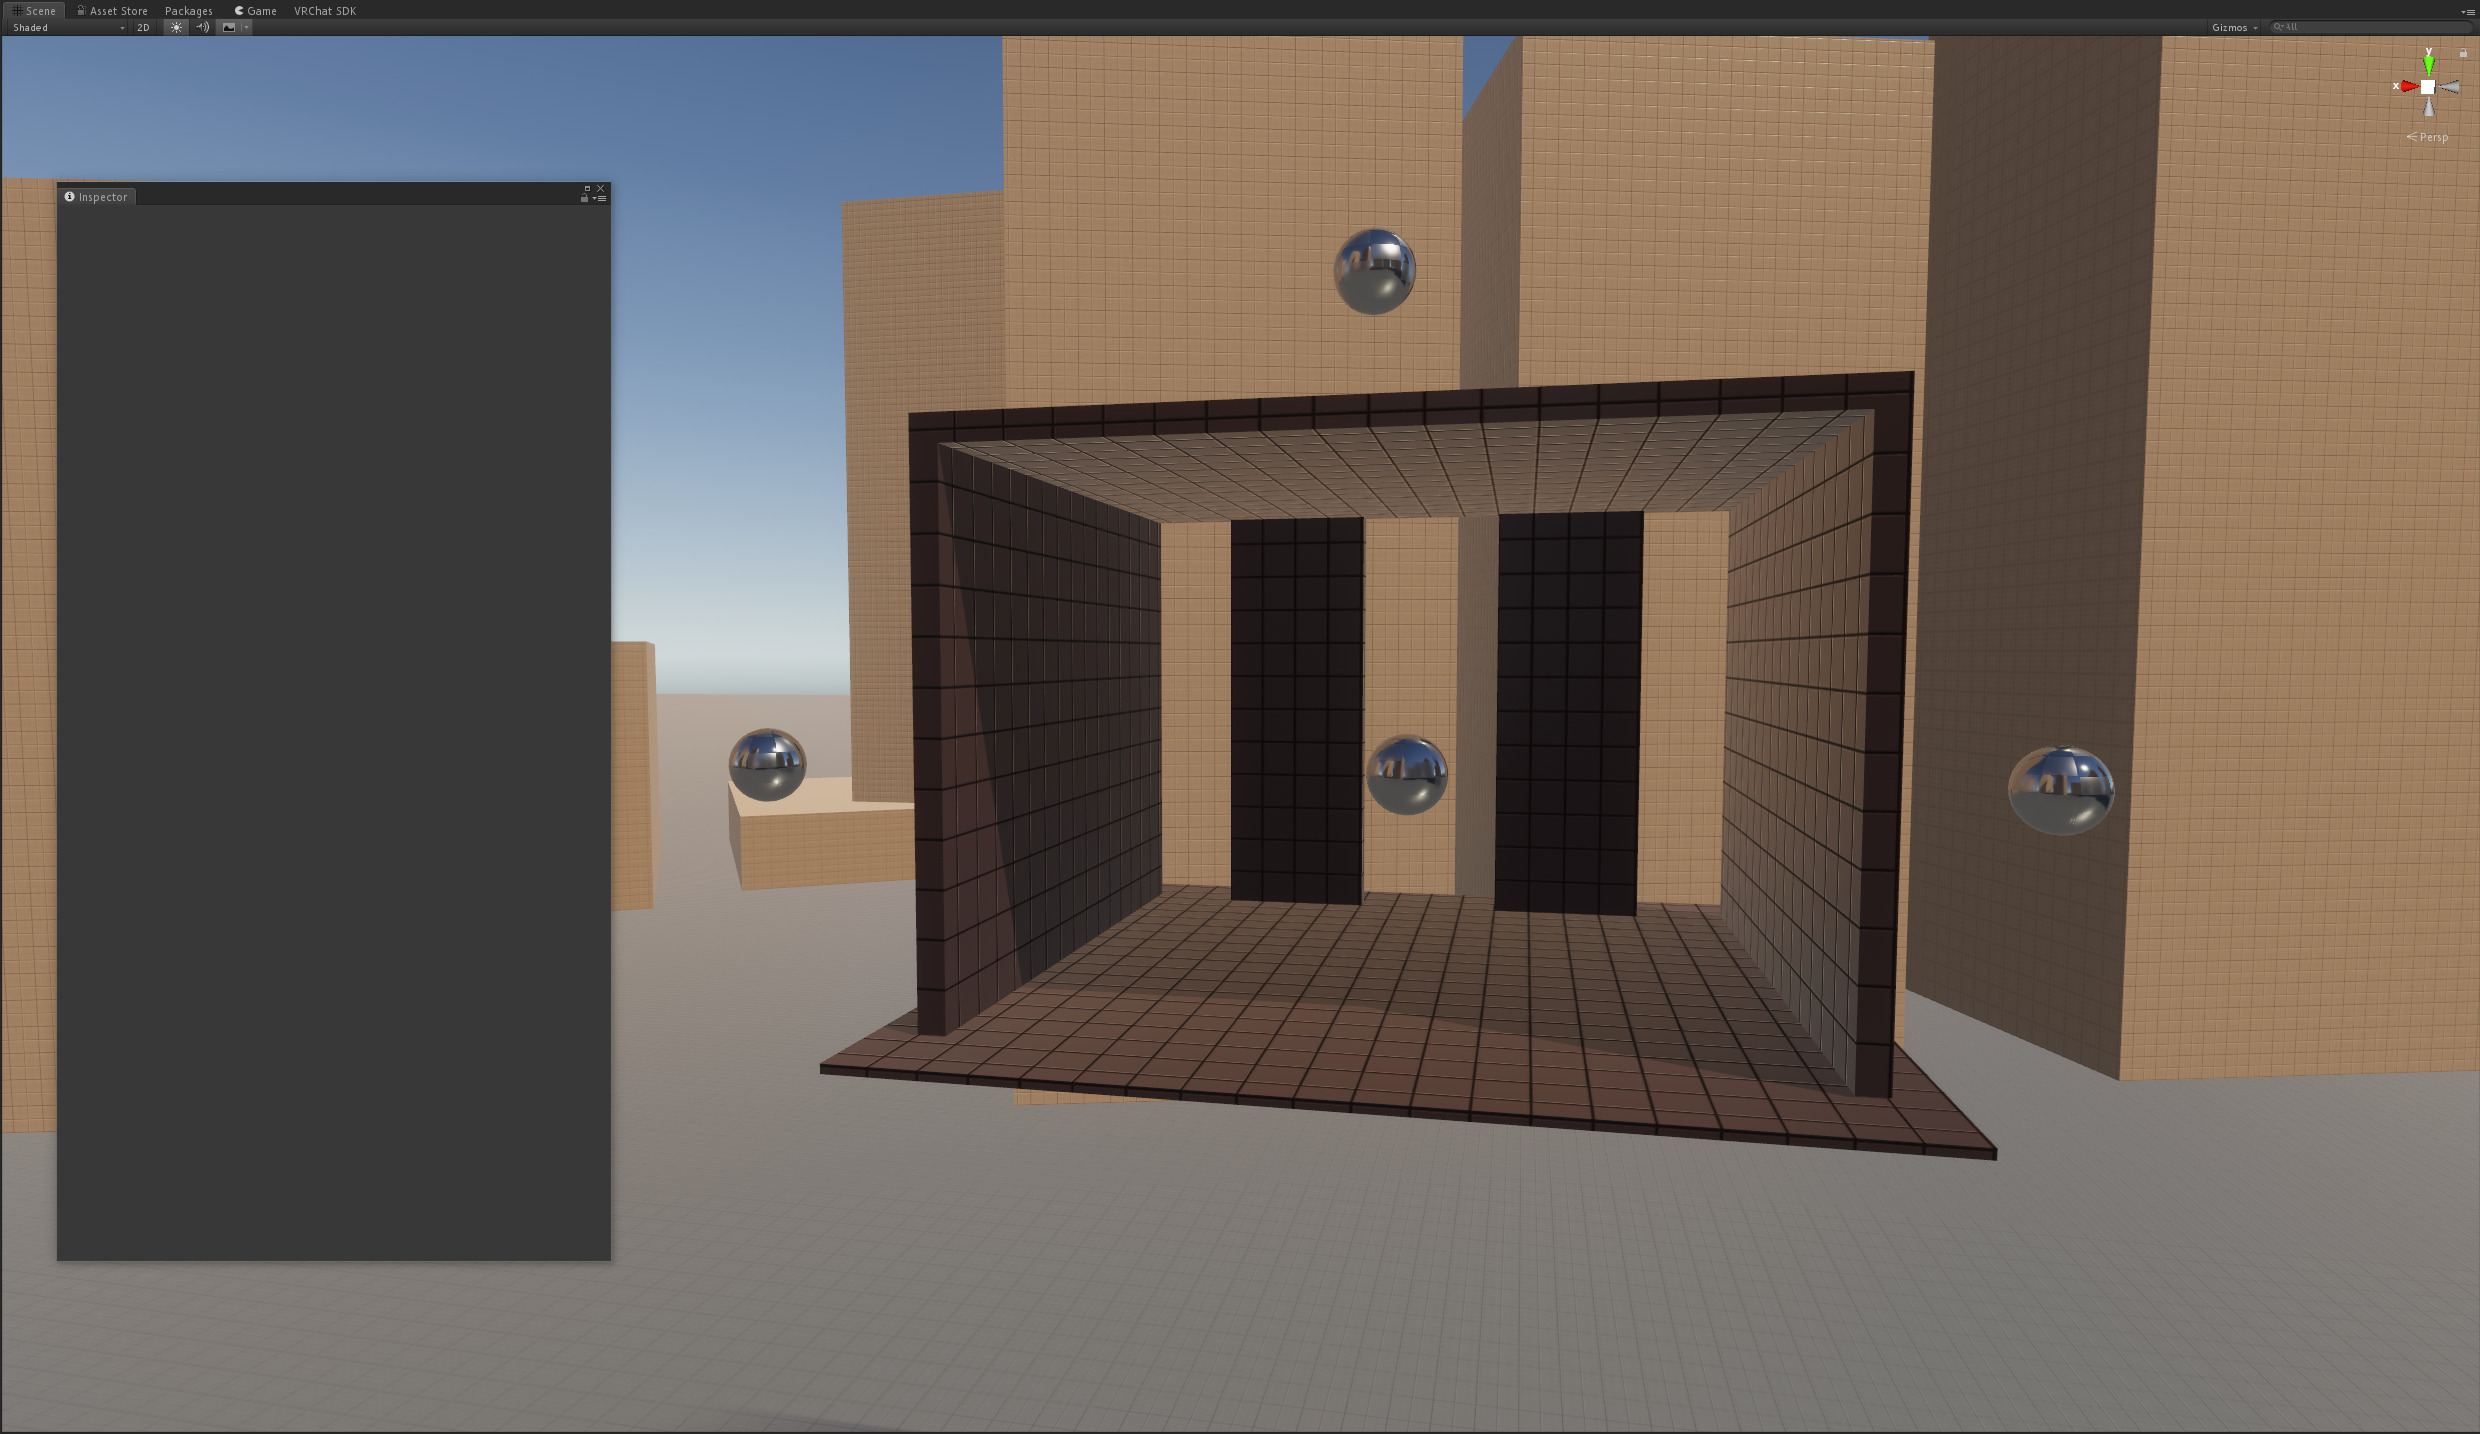
If this is an important area of the map, just put an extra probe there!
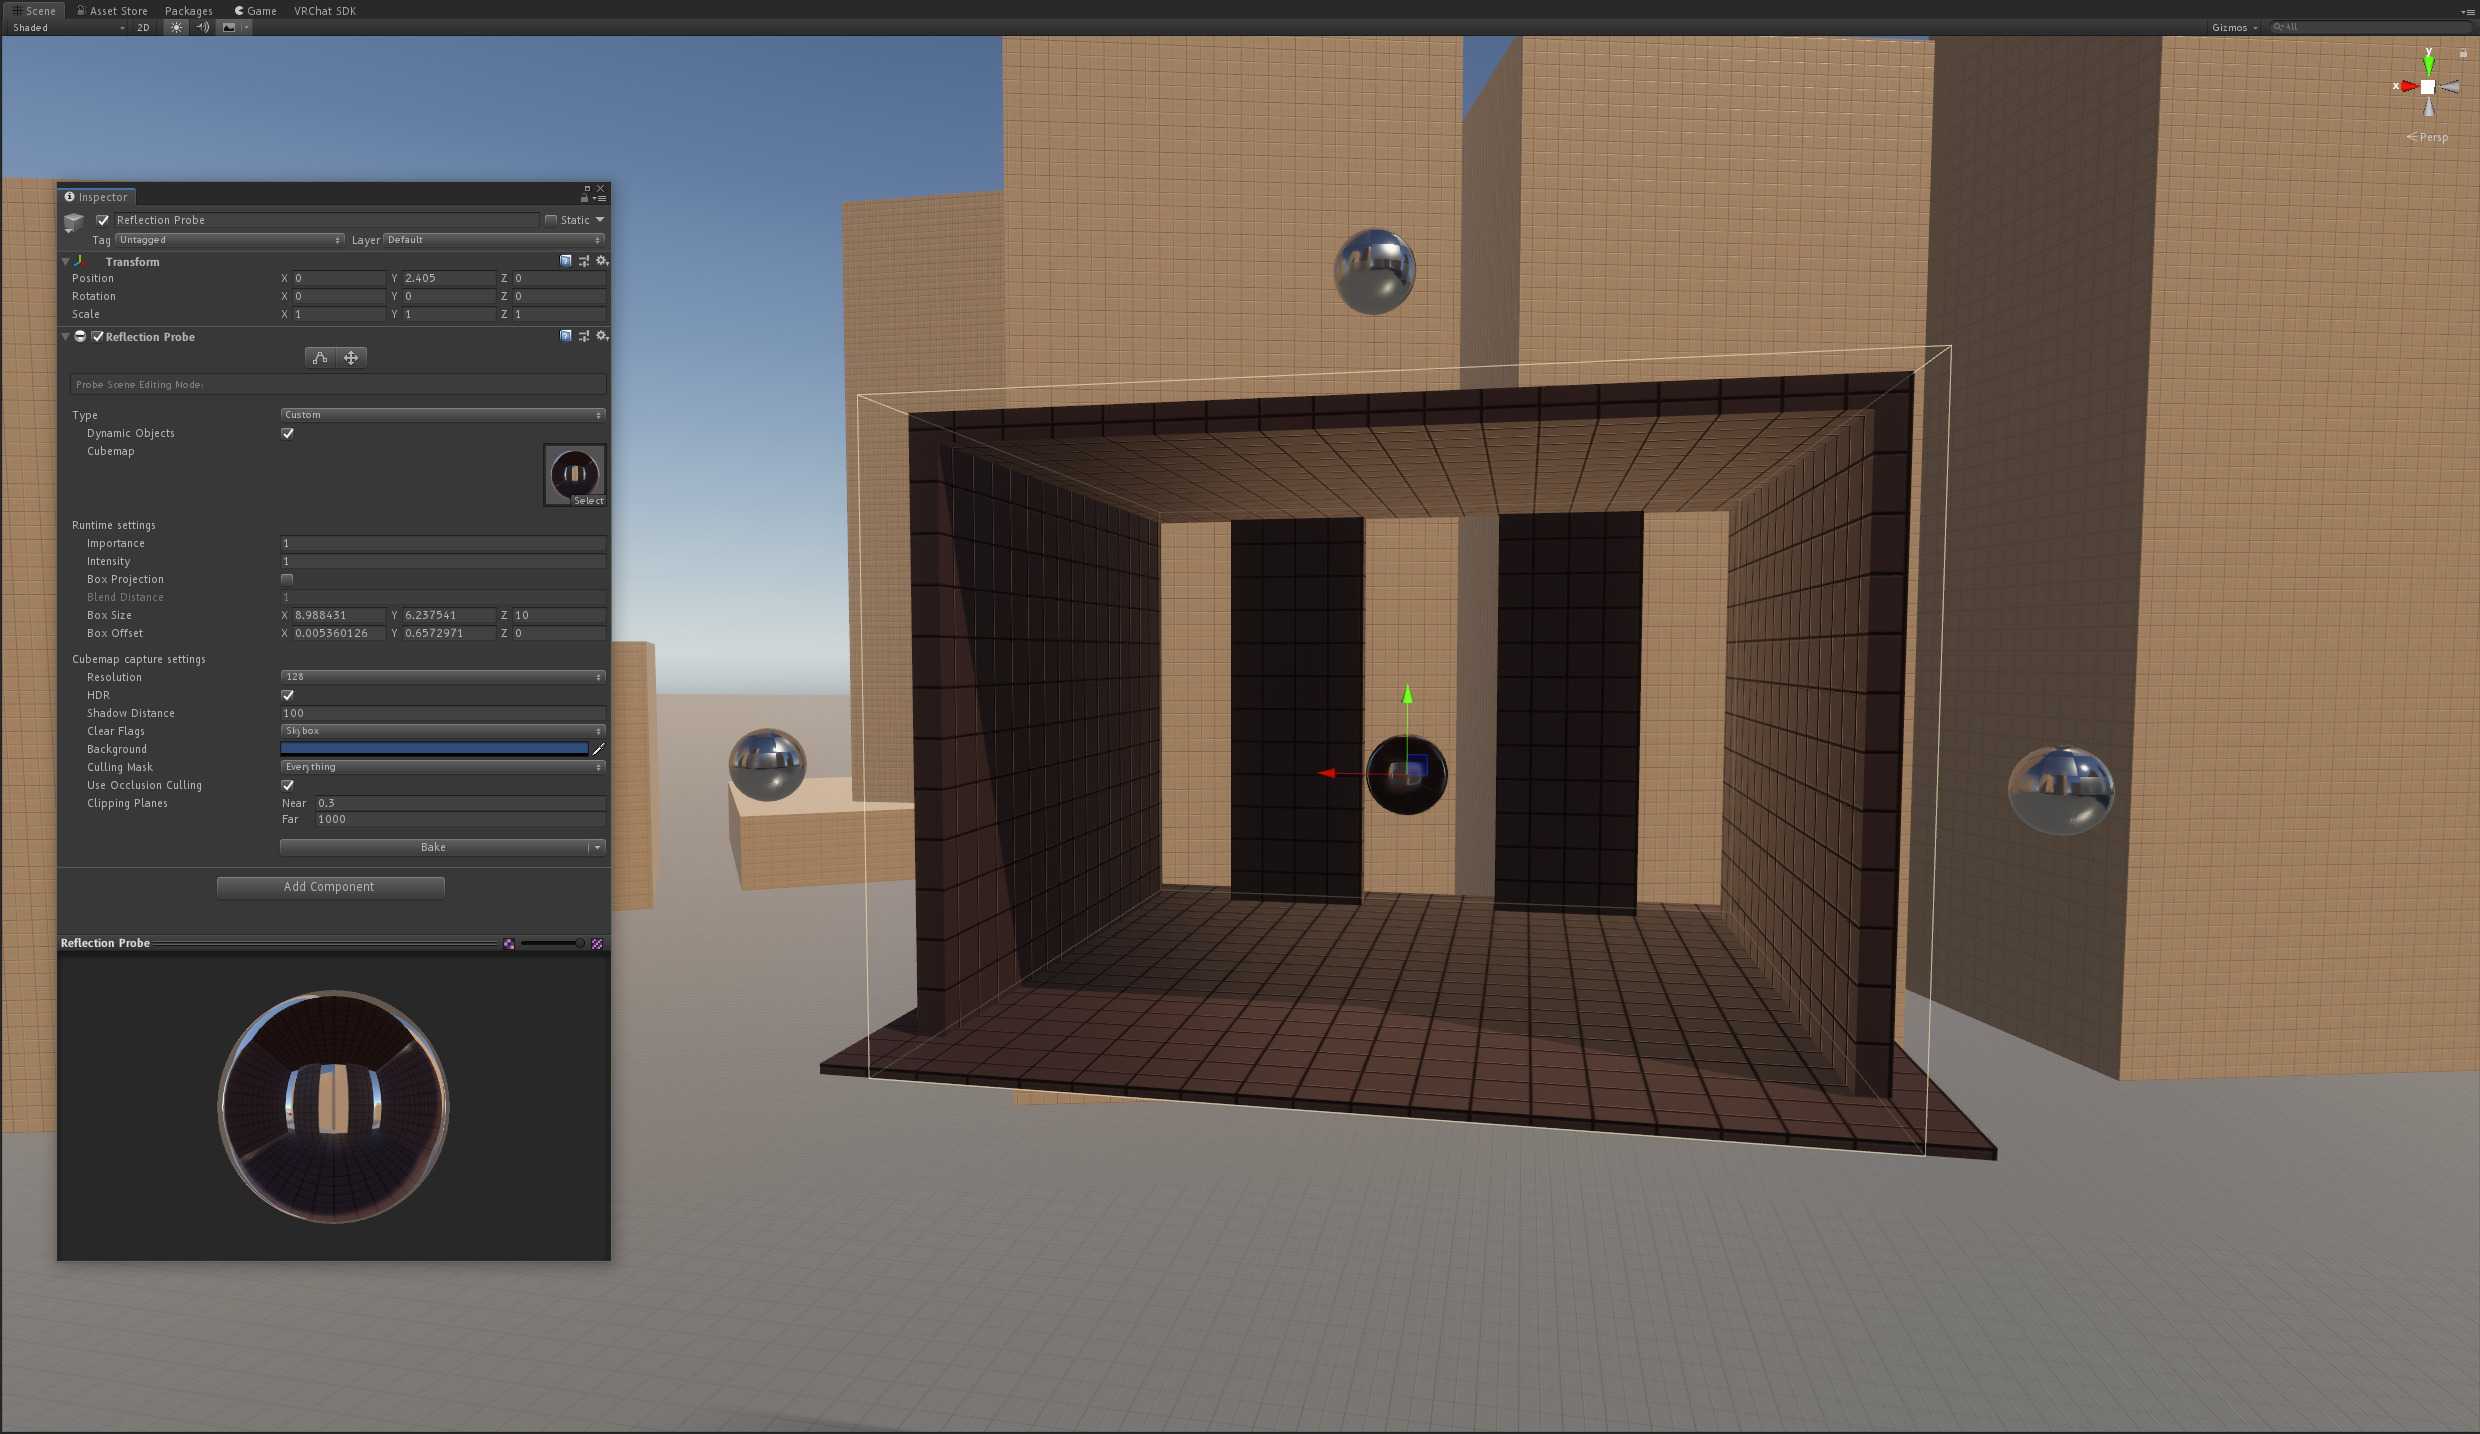
In this screenshot, I've set up the probe area using the controls at the top of the Reflection Probe component. Because the probe area is defined, the steel spheres next to the structure are still using the outside reflection, while the sphere inside is reflecting the room. The room is reflecting itself, so the sky isn't visible, though the buildings are through the back wall.
If the area is box-shaped, we can fit our probes' bounds to the walls and enable Box Projection.
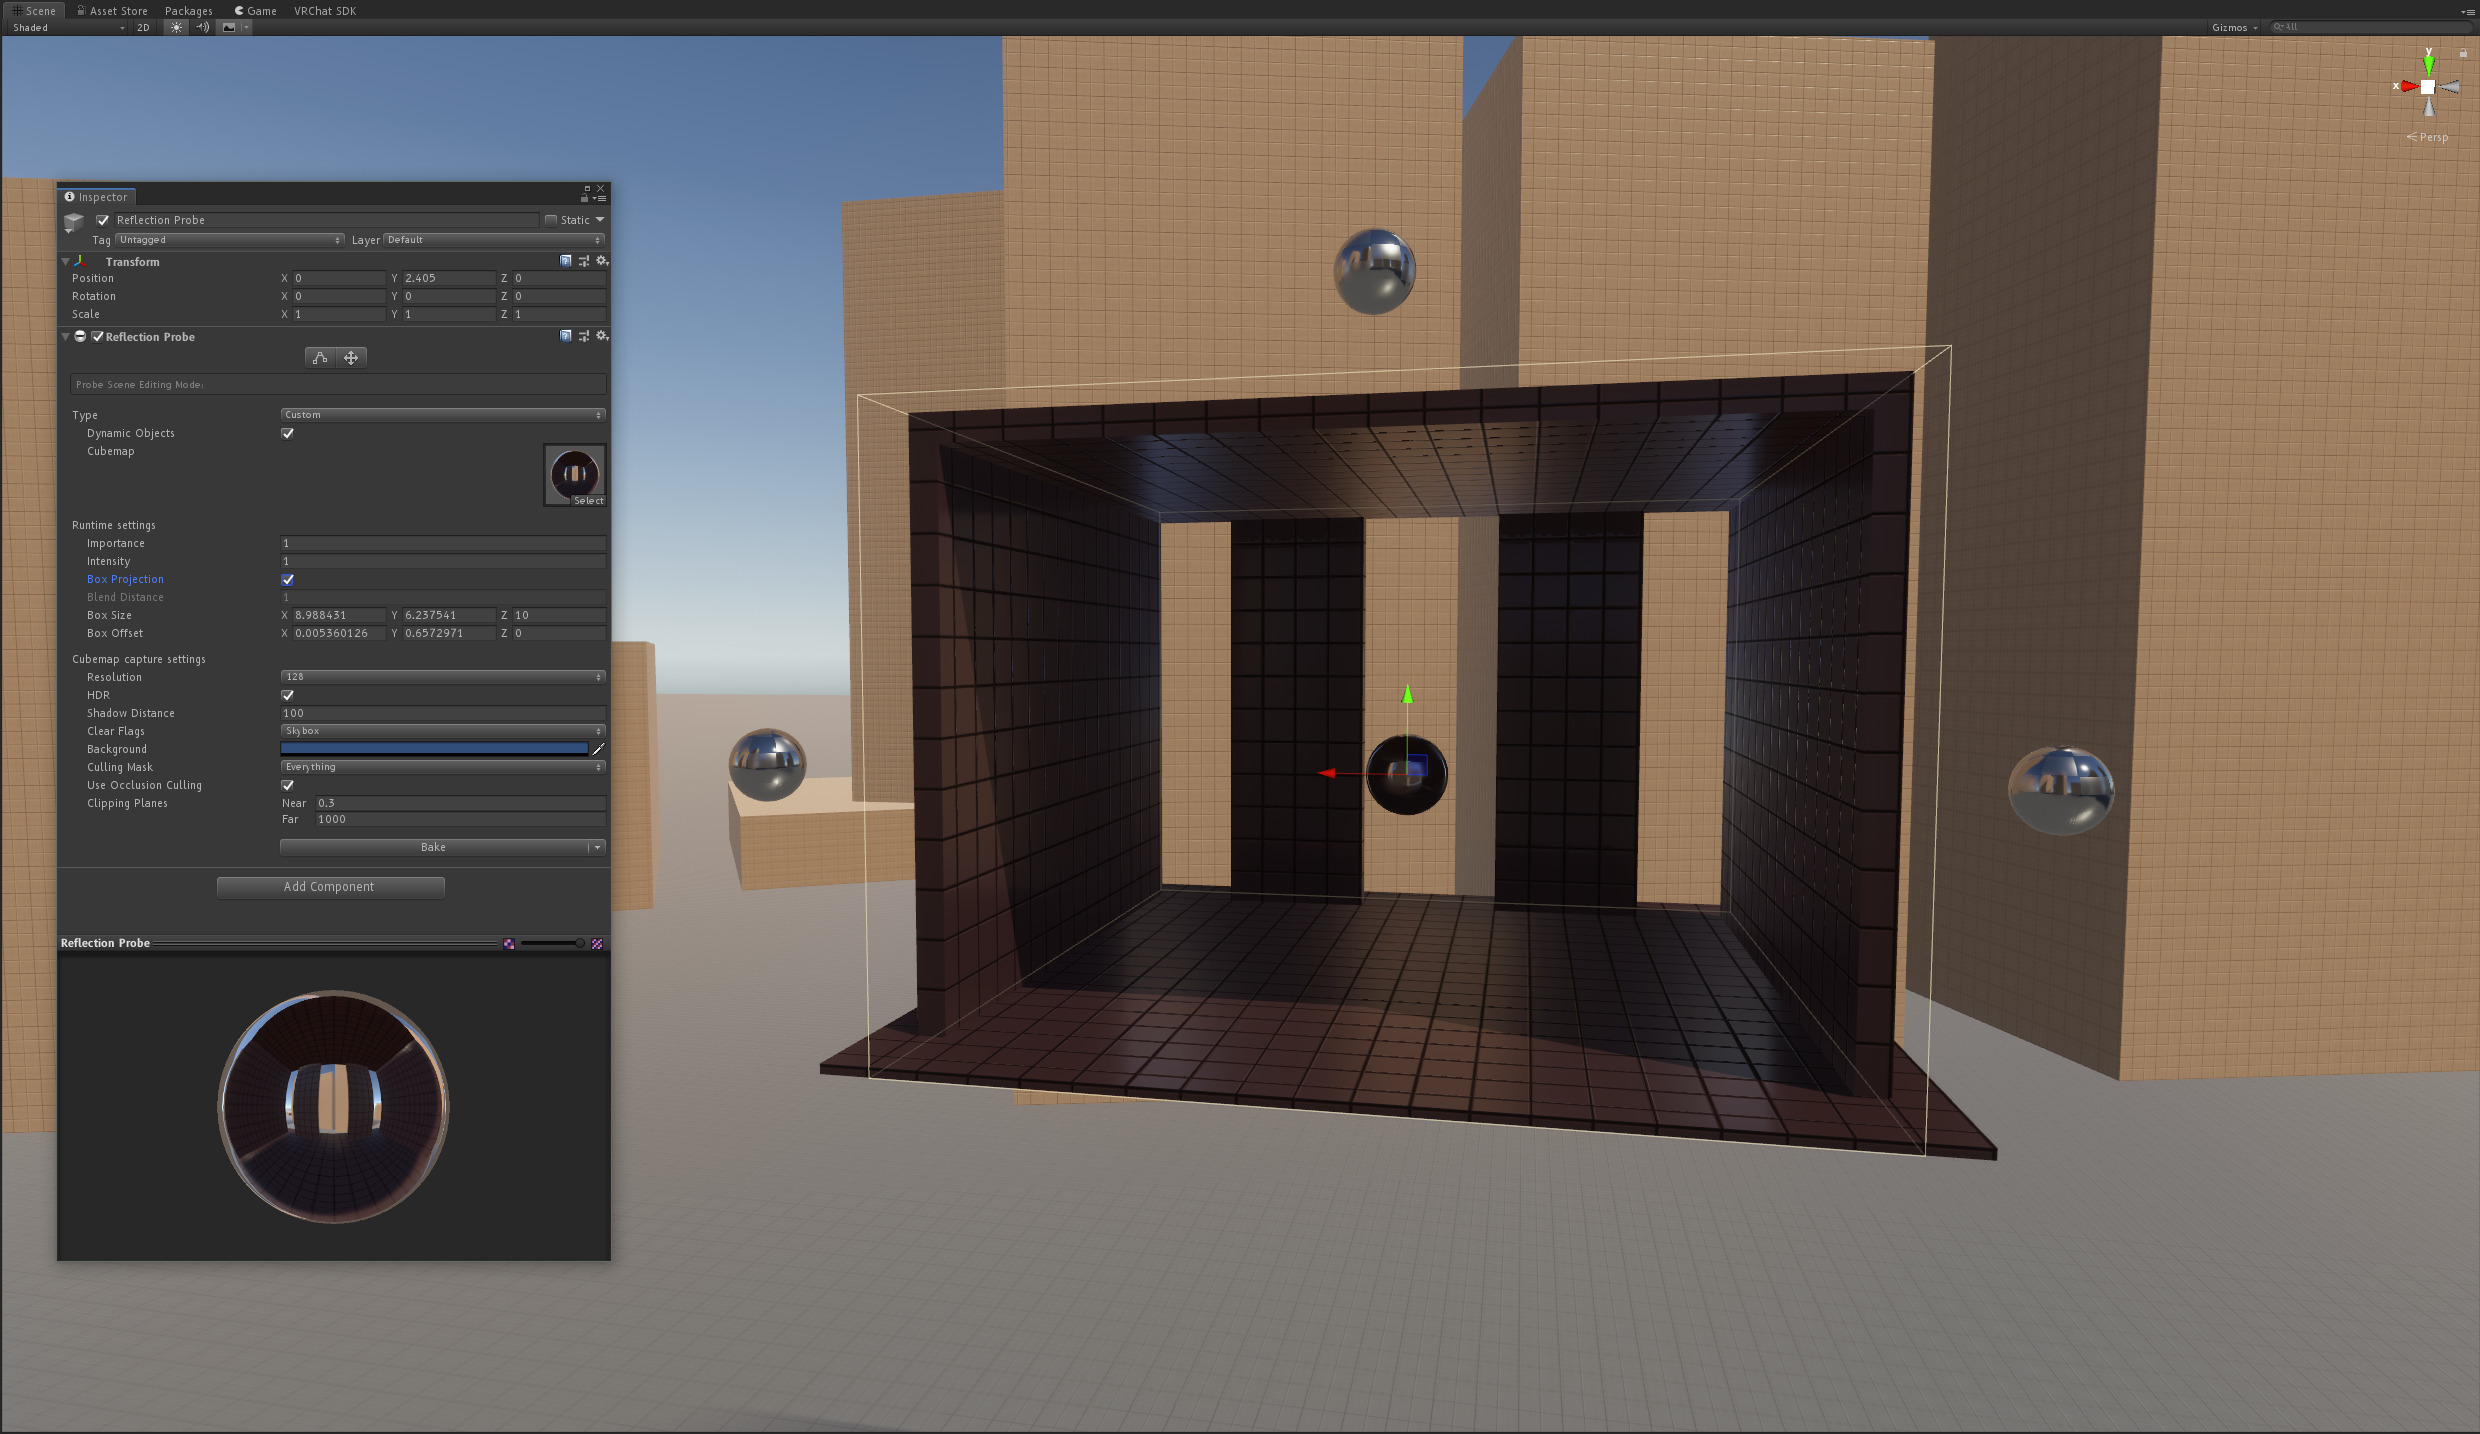
Box Projection is a powerful technique that will fit your reflection probe to a box. Used well, it can make reflections look really good, even if there's no perfectly reflective surface around to show it off.
Notes for box projection probes
Reflection probe bounds define what objects are affected by the probe. At the edges of the bounds, the objects will interpolate between the original probe and the most important, closest probe. For regular probes, this happens from the inside out. For box projection probes, though, this is outside-in.
A video showing the expanding bounds of a box projection probe. Thanks ScruffyRules!
The bounds of box projection probes will actually expand to encompass the objects around them, based on the bounds of the objects' mesh renderers. This can cause big problems with large meshes, because a box projected probe that is too small for a large mesh but has a high priority will be stretched to fit the larger mesh.
No Comments