Textures and Materials
Now that we have our geometry, it’s time to apply some detail to the surfaces. The way this is done is through materials. Materials can be applied to the faces of geometry and combine a shader and one or multiple textures. To create a material, right click in the project tab and select Create>Material. The default shader is the standard shader, which is a physically based, or PBR shader.
Before we get too much into that, we should set up post processing in our scene. This can very easily be done with VRWorldToolkit. At the top menu bar, go to VRWorld Toolkit>Post Processing>Setup Post Processing and click OK. The defaults should be ideal but if you want to adjust them I would recommend first reading this guide by Silent.
I want you to go to this website, ambientCG, and pick a wood floor that you would like to see in your room. When you find one you like, check the dimensions (we’ll need these for later), MAKE SURE THE DIMENSIONS ARE THE SAME (not that non-square textures can’t be used, but they require more steps, are less optimized and don’t compress as well) download 1K PNG, extract, and import into Unity by creating a new folder labeled “_materials" in the project tab and dragging in the folder.
This is going to be the most theory intensive lesson because the knowledge of how PBR shaders work is necessary to make correct, good looking materials.
Having a single PBR shader ensures that all materials have consistent shading applied to them, just like in real life. PBR is based on real physical principles, so to understand PBR, you must understand how light interacts with surfaces in the real world. If we drag our material onto the floor we made in the last lesson, we can follow along to see how the standard shader incorporates these principles.
When light hits a surface, some of that light is reflected. Naturally, some light will be absorbed by the materials, but the reflected light is what allows them to be visible. The wavelengths that are absorbed, and, more importantly, the ones that are not, is what gives a surface its color. You can set a base color by clicking on the color picker of the albedo (also sometimes referred to as diffuse or base color).
In the color picker window, at the bottom you’ll see the red, green and blue channels. Above that you’ll see the color picker UI, where up and down controls value, left and right saturation, and the wheel around it controls hue. However, this setup is deceiving, because as you increase saturation, value is decreased. And even more confusing, the amount of value decrease varies depending on the hue, with yellow being the brightest hue and blue being the darkest. Here's a video that covers this in more detail but it is something to keep in mind.
The next parameter is specularity, which determines the way light is reflected off of a surface. A 100% specular surface would reflect all of the light rays that hit it at the same angle. At the opposite end of the spectrum is diffuse reflection, where light bounces around inside a material before being reflected in a random direction.
If you click the shader dropdown, you’ll see that there is a standard shader, and a standard (specular) shader. These are two different ways of thinking about PBR because metals are distinct from non-metals (aka dielectrics). Dielectrics typically don’t have a specular component, while metals typically don’t have a diffuse component (exceptions would be imperfections like rust or dirt). The specular workflow gives the artist more control but also allows for the creation of materials that aren’t physically possible. The metallic workflow is therefore generally easier and more intuitive; I would recommend using it over the Specular variant unless your material comes with a specular map.
Now for the other slider you see on the Standard shader: smoothness; this controls the clarity of the reflection. Many materials, like a lot of metals, can be quite reflective but that reflection can still be blurry. This is due to the many micro imperfections on the surface invisible to the naked eye but still affect the angle at which rays of light are reflected (In other programs this gloss or its inverse, roughness).
Another key component of PBR is fresnel, which is applied automatically; essentially, a surface is more reflective when viewed at more intense angles. Additionally, with transparent surfaces, like water on a lake, they are at their most transmissive when viewed perpendicular to the surface and at their most reflective when viewed parallel to the surface. You can easily see fresnel on spherical material previews.
Now let’s put the albedo map for our wood floor into the correct slot in our material! You should now see how the texture is tiled across the surface, but if we bring in a 2m tall capsule for player reference, the planks look too small. So to get the correct tiling scale we have to take the dimensions of the texture (in meters) from the website we got it from, whip out our calculator, and divide 1 by those dimensions. The result is what we plug into the X and Y tiling slots in the material, and now it’s the correct scale.
If you look around for textures, you will see diffuse and albedo, which are both supposed to go into the base color slot. The difference between these two similar texture types is that diffuse textures have directionless shading (like because of crevices where it’s harder for light to reach), while albedo textures have all their shading information removed and put into an ambient occlusion, or AO map. The advantage of this is that the material can react to changes in lighting, for example shining a flashlight against it.
Let’s plug in the AO map to our material! For it to display correctly, click on the texture in the project tab and in the inspector uncheck where it says sRGB (Color texture), since this is a grayscale texture.
Most every surface exhibits details too small to reasonably recreate with geometry. This is where the normal map comes in. Place it into the appropriate slot, click the Fix Now button that appears and now you should see that the material now really “pops”. What a normal map does is change the angle at which light is reflected for each pixel in the texture, also called a texel.
(Each pixel in the normal map represents a vector, where red is horizontal, green is vertical and blue is depth. The “default” blueish purple in a normal map is 50% red, 50% green, and 100% blue, which indicates no change in lighting angle of the corresponding surface.)
Heightmaps are used to fake depth in a material. This should also be set to non sRGB like the AO map. When we apply it we should see the change in our material but it may look a bit off. That’s because in Unity they are approximated by using a technique called parallax mapping, but it breaks when viewed at sharp angles. Typically I don’t set the intensity very high, either the default 0.02 or lower.
We talked a lot about reflection, and as you should see the reflection of the wood floor doesn’t look very accurate. It looks like it’s reflecting the sky! That’s because the reflection in objects is set to the skybox as the default. To change this, create a reflection probe by right clicking in the hierarchy and going to Lighting>Reflection Probe.
A reflection probe is essentially a 360 camera, capturing a spherical view of its surroundings. The resulting image is called a cubemap, and is used for the reflections in objects.
Place the reflection probe in the middle of the room. Under the reflection probe component in the inspector window, there should be two buttons, click on the left one first. This is the bounds, and the objects inside it will have their reflections affected by the probe. The right is the probe origin, or where the reflection probe will capture from.
Now let’s make the material for our windows! Create a new material, name it glass, and drag it onto the window panes. Change the rendering mode to transparent, select the albedo color window and under the RGBA channels, decrease the A channel to 0. The A channel stands for alpha and it controls transparency. Now increase the smoothness to the maximum. Now we have a window that we can see through! Note that if you increase the metallic or specular the transparency decreases. Remember that increasing the specularity not only decreases the base color, it also decreases transparency.
The next important concept to understand is that of material slots. Each polygon is assigned a material, and material slots are a part of the mesh. You can see the assigned materials at the bottom of the inspector window when you click on the object.
We should always compress the textures in our world because they are going to be downloaded by every person who visits the world. To do this, click on the texture file in the inspector and check “crunch compression”. Your textures will now boast a much smaller file size, at the expense of compression artifacts (but no one is going to notice or care). Then click on the Android icon and check “override Android settings”. Then under format, click RGBA Compressed ASTC 6x6 block (this compression algorithm will ensure our textures do not look awful on Quest. Alternatively, you could switch to 4x4 block for better compression but with a higher file size). We should also probably reduce the max texture size on both platforms; this will also have the largest impact on the world’s download size.
There are a couple of other settings we should change. Under Advanced, check Streaming Mip Maps (required for VRChat), change the filter to Trilinear and the Aniso level to 8. Now click the sliders icon in the top right to the inspector (in between the ? bubble and the 3 vertical dots) to create a preset. This way every texture you import from now on will take the settings from this preset (except for those imported from a UnityPackage).
You can also go into VRWorldToolkit>Quick Functions>Mass Texture Importer to change all the textures in the Scene en masse. After a world build you can go into VRWorld Toolkit>World Debugger>Build Report to see all the assets in the world sorted by largest file size.
Unfortunately, Unity’s Standard shader doesn’t support plugging in roughness maps as is. These are very useful as they give varying smoothness throughout the material which adds realism (like a wet road with puddles, the puddles would be smooth while the road wouldn’t be). Unity only supports using smoothness maps (aka gloss maps, the inverse of a roughness map) as the alpha channel of the metallic or albedo texture. There are several ways to implement roughness maps:
- The easiest way would be to use a different shader, like Autodesk Interactive (or Moochie standard, Silent Filamented, or other community shaders which will be covered in a later lesson)
- Use an add-on like SmartTexture to pack the roughness map into the albedo or metallic texture, check invert color and use luminance (it has crashed when I used it so don't forget to save!!)
- Use image editing software like GIMP to create an alpha channel and layer mask for the albedo or metallic texture, invert the roughness map, copy paste it as the alpha and export
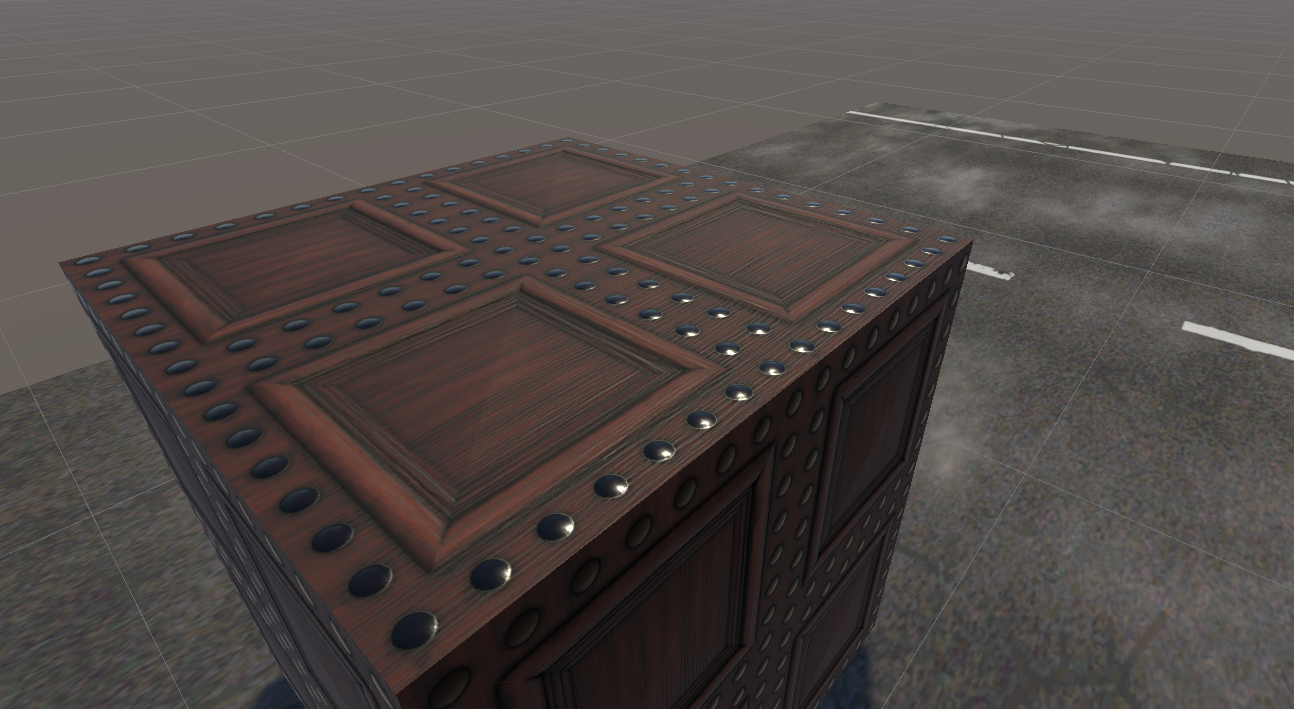
This wood pattern texture is a good example of when smoothness maps make a difference; notice how the nails are very specular and have high smoothness while the wood has little specular and varied mid-smoothness that match with the grains.
[h2]UV window and UV stitching[/h2]
Click on the UV editor in the Probuilder tab. UV coordinates is what tells the mesh how to project the textures onto the faces. The U and V are the 2D axes of the UV space, since X, Y, Z and W are already taken by the 3D space.
We won’t get much into UV editing in this course because Probuilder does most of that for you, but the most useful thing to know is how to stitch UVs. To do that, with the UV window open, click on a face in the scene view and then hold shift and click another connecting face. The UVs will now stitch, and make the texture continue without a seam between the faces.
Now you can find some other textures to finish the room, and we can move onto the next stage, lighting!
No Comments