Creator Terminology
If you have any terms you believe should be added, comment or message Tricky#6071
This is a work in progress! Stuff isn't organized nicely :(
Kitbashing - Kitbashing is creating models by "bashing together" a myriad of other assets.
Quest - Refers to the Meta Quest headset and in VRChat, refers to the Quest version of VRChat.
OSC - Is a way to get different devices and applications to talk to each other. This can be used with VRChat to do many different things. You can read about it in the VRChat documentation.
Debugging - Debugging is the act of testing and identifying issues in order to fix them. Such as testing avatars, or worlds.
Blender - Blender is a free, open source, 3D modeling program. Many creators on VRChat use it to create models.
CATS - CATS is a commonly used addon for Blender used to make importing and optimizing models easier.
Shapekeys/Blendshapes - Shapekeys allow one to deform a model for animations. Shapekeys can be made in 3D programs such as Blender. Shapekeys in VRChat are most often used for facial expressions.
Visemes - Visemes are shapekeys made for lipsyncing, they are 15 different shapekeys made to give accurate lip syncing to avatars when a player speaks. You can view the 15 visemes VRChat uses here.
Texture - A texture is an image that is used on a model to give the model details. UV maps tell the model which parts of a texture should use. There are many different types of textures, but the most common is the "Diffuse" texture, also known as the base colors.
Material - Different from a texture, a material is an asset that changes the appearance of the surface, materials can use many textures to achieve many different effects. Below you can see an example of a material in Unity using Poiyomi's Toon Shader.
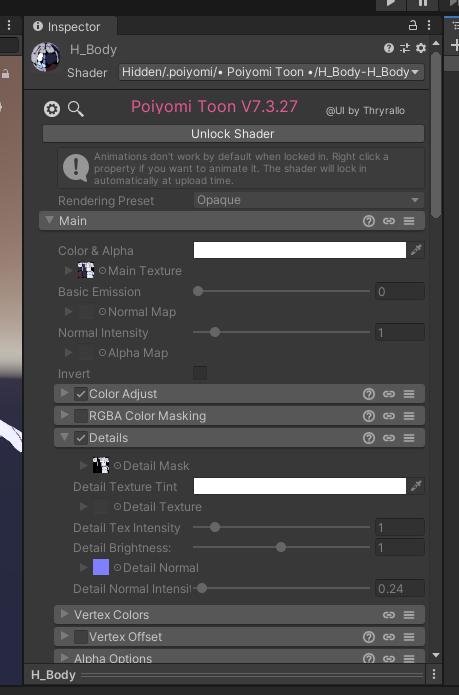 Shader - In Unity, a shader is a program that contain instructions on how render materials. These are used in conjunction with materials. An example of a shader is Poiyomi's Toon Shader.
Screenspace Shader - Screenspace shaders can be used to make reflections, refractions, and make special effects. These should be used in heavy moderation when used for special effects as they can cause sickness or epilepsy in people.
Diffuse Map - A diffuse map is a type of texture that defines the color of an object.
Normal Map - Normal Maps are a type of texture to fake lighting bumps and dents on models. They can be identified by their distinct blue color, combined with cyan and pinks. Below is a 3 minute video explaining them further in detail.
Metallic Map - Metallic Maps are a type of texture used to define the areas that should behave like metal. Below is a short video quickly explaining how roughess maps work.
Roughness Map - Roughness maps are a type of texture that represents the smoothness/roughness of a surface. Below is a short video quickly explaining how roughess maps work.
Ambient Occlusion Map - An Ambient Occlusion map is a texture that contains shadow information. Below is a short video quickly explaining how ambient occlusionmaps work.
Masks - Masks are a type of texture you use to tell a material for example where a certain effect should be placed. These textures are grayscale. Often, the area you don't want to be affected should be black, and the area you do want to be affected should be white. These are greatly useful in a myriad of situations. Below is an example of a mask being used to tell the material to only apply the matcap to the bell of the model.

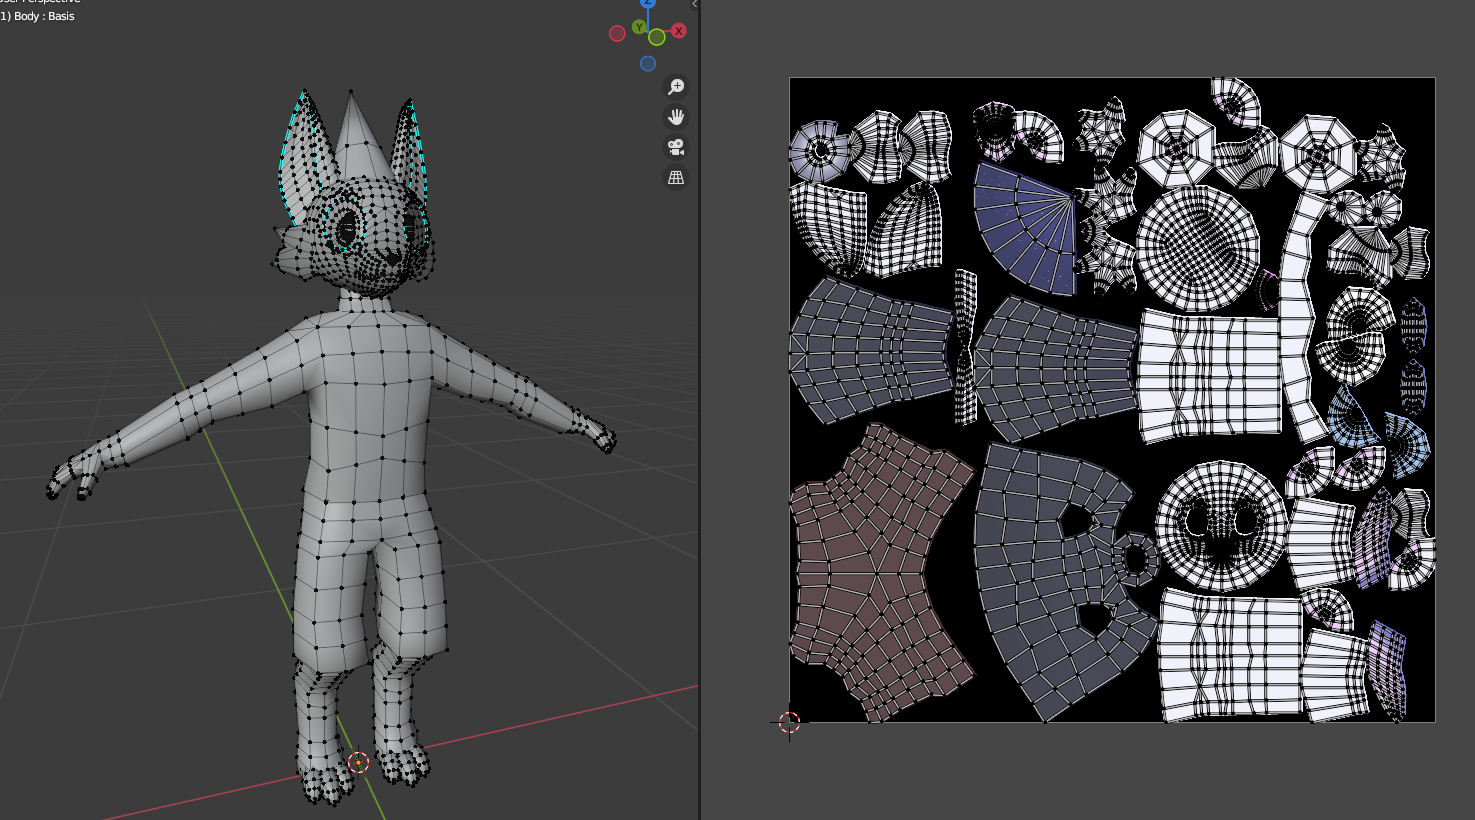
UV Maps - A UV Map, also just known as UVs, are a set of points that tells the model how to apply a texture. Below is comparison of a model and it's UV map, along with a sort of visualization that may help explain how UV mapping works.
Nothing better than christmas chocolates to explain #UVmapping to your kids #CGI #3D #material #texture pic.twitter.com/Z8SBrdO2SR
— xxivips (@xxivips) December 6, 2017
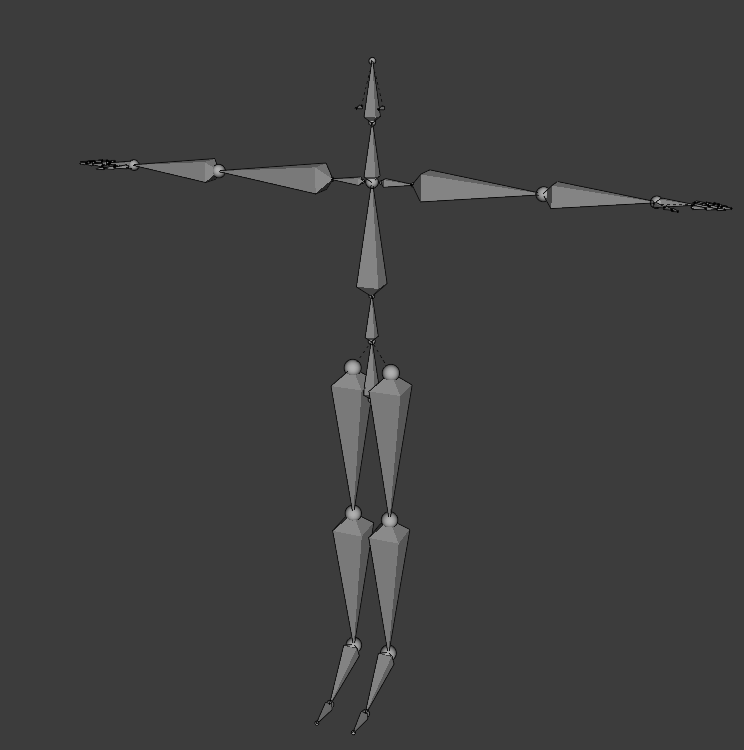
Armature - An armature is the "skeleton" of a model, it's a set of "bones" that are connected to the model through weight painting, the bones can be animated or posed for motion. An example for a humanoid armature can be seen below.
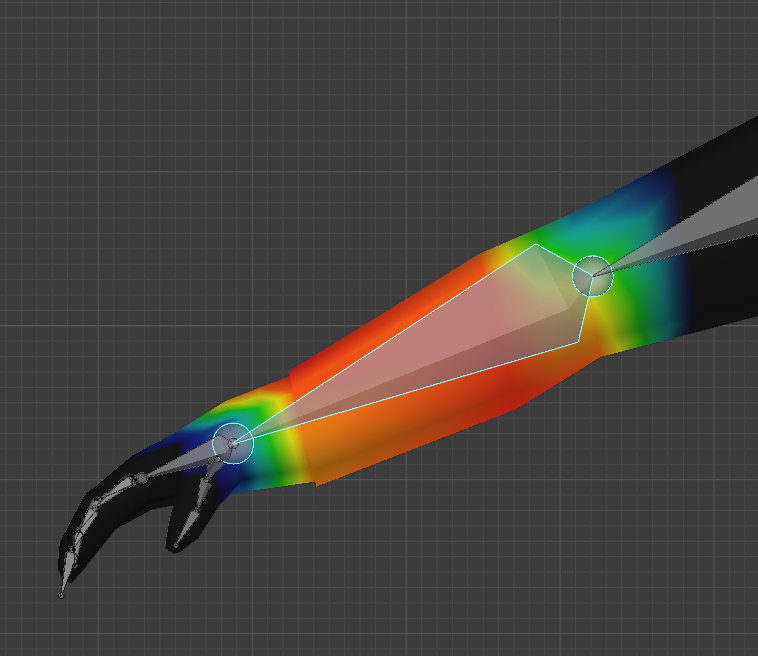
Weight Painting - Weight painting how a model moves in relation to it's armature. Below we can see an example of a model's forearm weight painted to the forearm bone of the armature in Blender. The more red it is, the more it moves with that bone, the more blue it is, the less it moves with that bone.
(Zero weight active overlay is enabled in the screenshot here)
No Comments