Creating a Basic Toggle
To preface, you’re expected to have a somewhat decent knowledge of Unity terminology and how to do basic things. Basically, if you know how to make an avatar and upload it, you should be good.
Step 1: Have whatever you want to be toggled ready!
Shirt, sword, prop, whatever it might be. Make sure you have it all set up already, depending on if you want it on or off by default make sure it’s disabled/enabled in your Hierarchy.
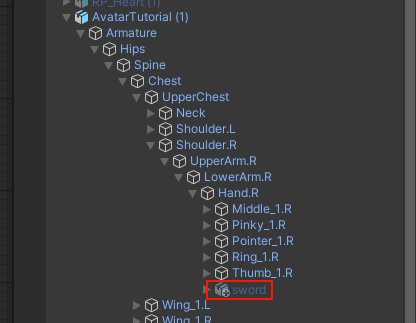
For example, I’m making a toggle for a sword on my avatar, I have it off by default.
(Normally I would be using a parent constraint instead but thats a completely different tutorial.)
Step 2: Duplicate your avatar
This will make it the easiest to avoid accidentally doing anything destructive to your avatar, do this whenever you make a new animation for your avatar, just make sure you have everything you’ll need already set up before doing this. The shortcut for duplicating something is ctrl+d while you have it selected, or right-click the main parent and click “duplicate”.
Step 2.5: Actually making the toggle animation
With the duplicated version of your avatar selected, go to the “Animation” window, and click the “Create” button, then click the small red circle to “record” any changes you make, the timeline bar should turn red. Now, activate/deactivate whatever you’re toggling in your Hierarchy and a new keyframe should be made in your Animation window.
If you cannot find your animation window, press ctrl+6.
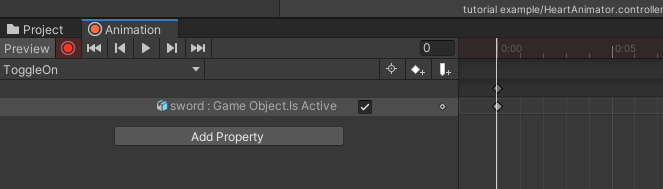
Since I’m making an animation to toggle the sword on, I have the “Is Active” checked. You'll also want to create a toggle off animation, click the name of your animation in the window and create a new one doing the same steps, but make sure "Is Active" is off.
Step 3: Set up your expression menus and parameter file
If you already have these files on your avatar you don’t need to do this.
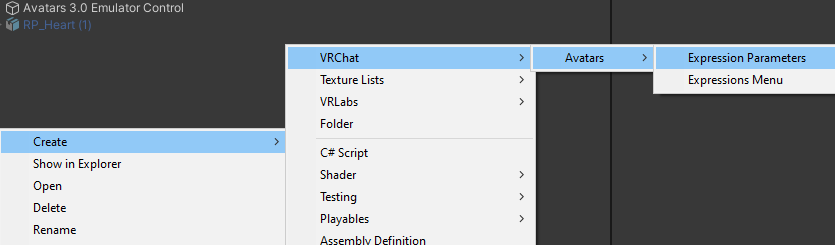
Create the files
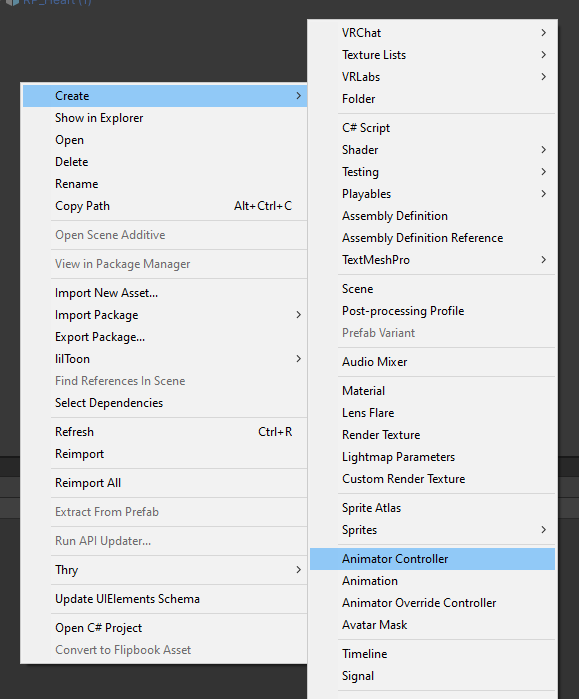
Right-click in the empty space of your “Project” window and go to Create>VRChat>Avatars and make an Expression Parameters file and an Expressions Menu file. Also, create an Animation Controller under the Create tab as well.
Put them in your descriptor
On your avatar, go to the Avatar Descriptor Component and find “Expressions” then click “Customize” then put the files you just made into their respective slots.
(Again, if you already have these attached to your avatar you don’t need to do this.)

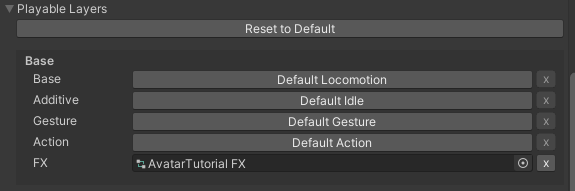
Under “Playable Layers” click customize if it hasn't been clicked already, and put the Animator Controller you made into the “FX” slot.
(Again, if you already have this attached to your avatar you don’t need to do this.)
Create a new parameter
In your Parameter file, click “Add” and change the type to “Bool”, you can set the name to whatever you want. I prefer to turn off “Saved” for props like this.
(A parameter with “Saved” enable will store the value of that parameter in-game when you switch off the avatar. So if you have “Saved” on, when you switch off the avatar with your toggle still on, it’ll save when you switch back into it and vice versa.)

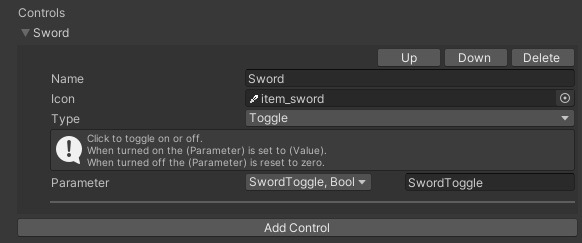
Create a new menu control
(The icon be whatever you want, it’s optional)
Step 4: Making the actual toggle
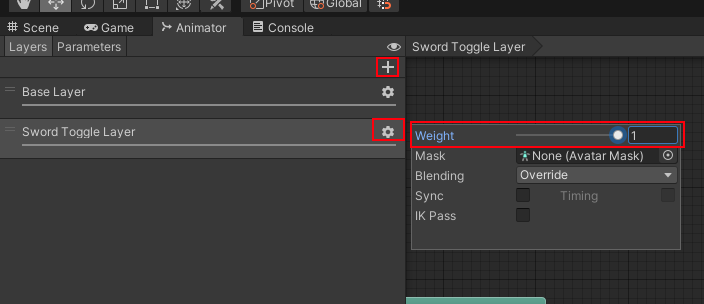
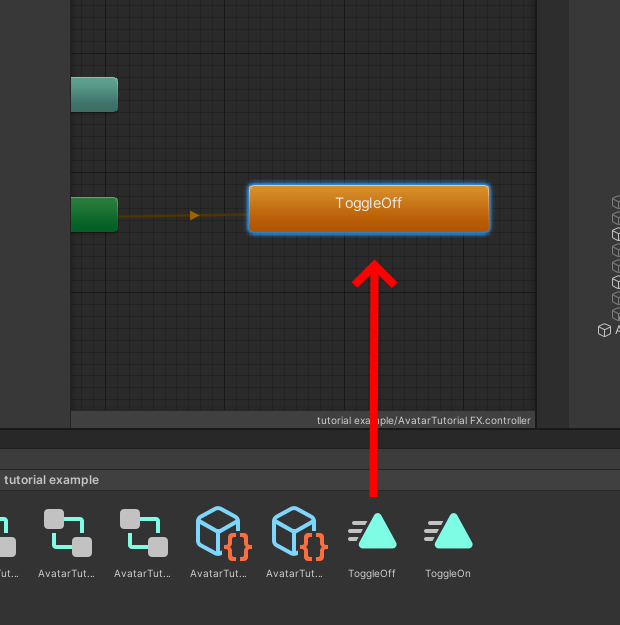
Create a new layer
Select your Animator Controller file, open your “Animator” window, and create a new layer by clicking the ‘+’ button, name this layer whatever you want. Click the little cog on the layer and change “Weight” to “1”, if you do not do this, it will not work, period.
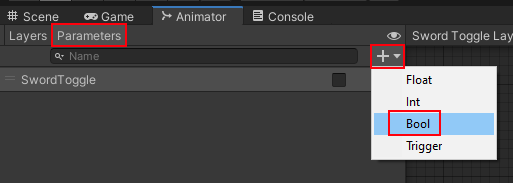
Add your parameter
Go to the “Parameters” tab and click the ‘+’ button, then add a new “Bool” parameter. Make 100% sure it is named the same exact thing as it is in your parameter file from earlier or it will NOT work.
Drag in your animations
Drag both the animations you just made into your animator in the layer we just made. Since my toggle is going to be off by default I'm making my "Toggle Off" animation the default state(orange node), you can right click an animation to change which is the default state. Your other toggle animation will be gray.
Turn off ‘Write Defaults’ for both nodes
VRChat documentation tells you to do this, do it.
“Turning Write Defaults off makes any changes made to the avatar through animation clips carry over to the next animation, for example if you set something ‘active’, it won't deactivate when transitioning off that state. When Write Defaults is on, it will revert any changes made to the avatar, so if you set something "active", instead of retaining, it will deactivate when transitioning to another state. VRChat recommends you uncheck Write Defaults because of bugs with stations iirc.”
(Explanation given by Marino)
Uncheck ‘Write Defaults’ for both gray and orange nodes by selecting each respectively and unchecking it in the inspector.
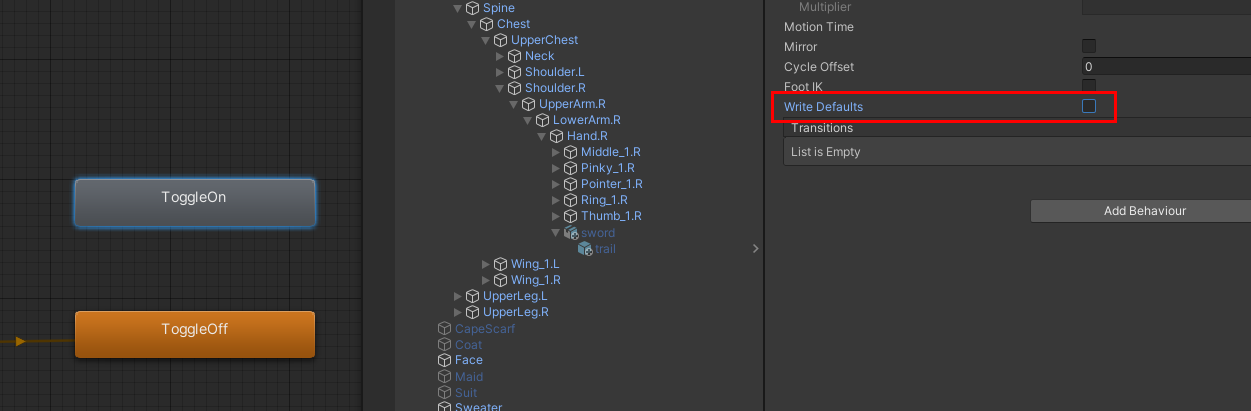
Note: don’t mix write default settings, if another layer on your animator has write defaults on and another has write defaults off it can cause problems, due to the way we’re setting this up in the tutorial, you can skip this step and leave write defaults on, but it's highly recommended that you turn write defaults off if you can.
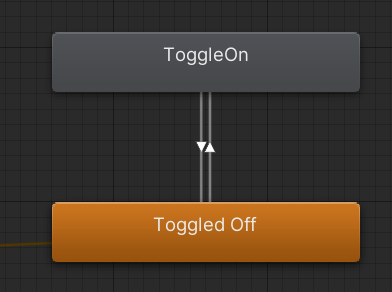
Add transitions
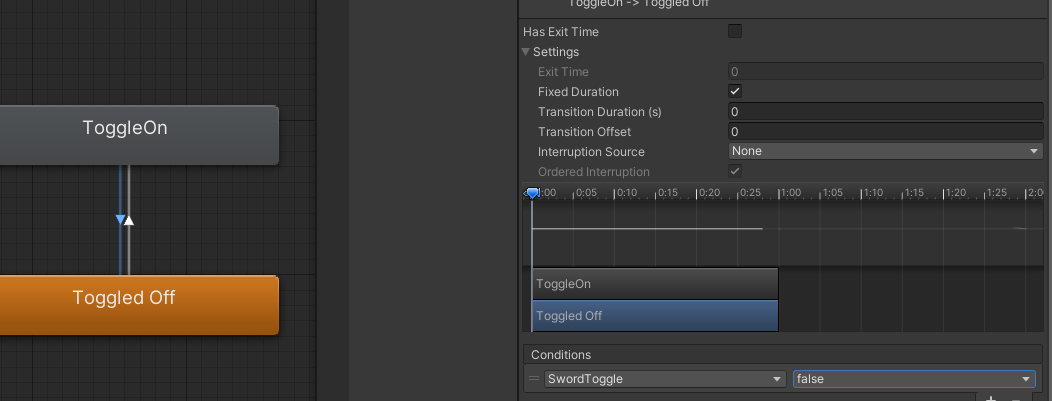
Right-click your orange state and click “Make transition”, click your gray node. Then do the same with the gray node to the orange node. It should look sort of like this.
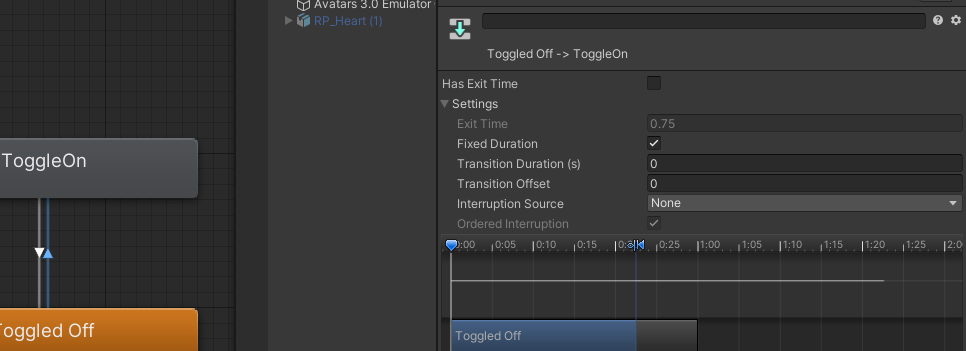
Change transition settings
Click the transition with the arrow pointing towards your toggle on state it should turn blue, and in the Inspector uncheck “Has Exit Time” and set “Transition Duration (s)” to 0
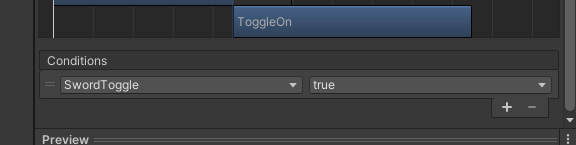
In the same transition, scroll down in the inspector window and click the ‘+’ button on “Conditions”, make sure it “[Parameter Name] true”
Repeat for other transition
Now select the arrow pointing away from your toggle on and do the same steps but make sure it’s “[Parameter Name] false” instead.
Step 5: All Done!
You can now upload your avatar to VRChat and your toggle should work! These toggles can be applied to pretty much anything if you just follow the same logic. Get to making those toggles!
If you encounter any issues or need help please direct all rage to @TrixxedHeART (That’s a joke please be nice to me or I’ll be sad)
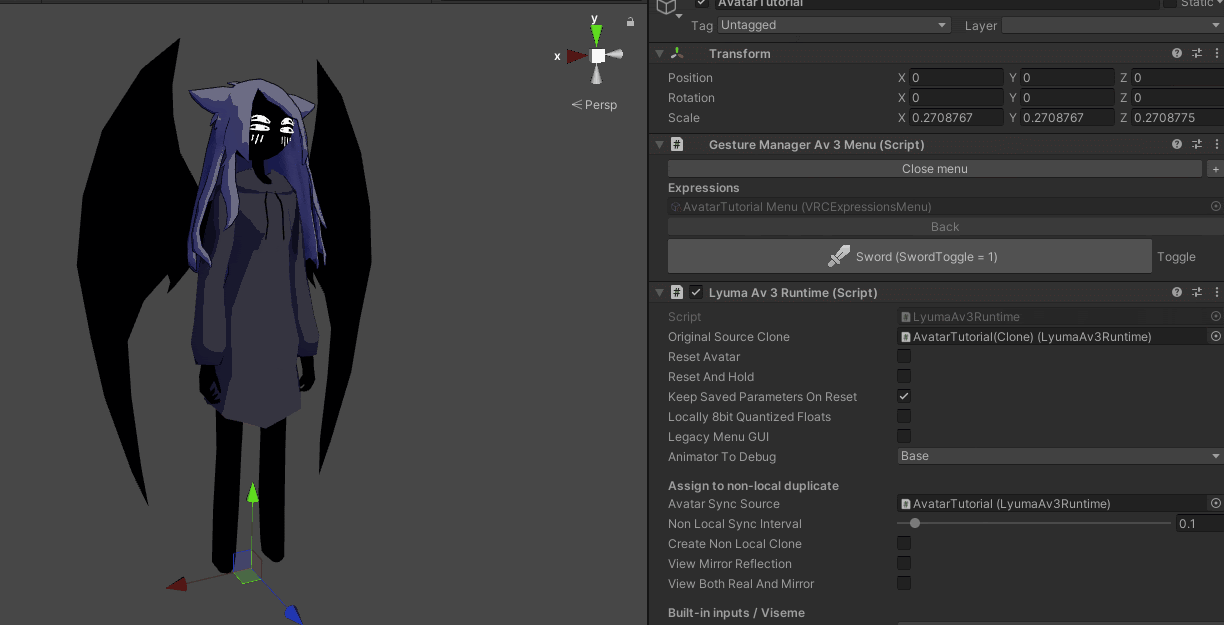
(In the gif below I’m using Lyuma’s Avatar 3.0 Emulator to test the toggle in-Unity)
1 Comment
...WHOA. You work fast!! This is pretty nifty, thanks for contributing! 😘