Blender Tips
Various small and big tips for doing stuff in Blender!
- Various Useful Things to Know
- How to Import Addons for Dummies
- Saving Startup Files
- Weight painting: Active Zero Weight Overlay
- Texture Painting External Projections
- Armature/Rigging: Bone Groups
- Normals: Data Transfer Normals for Cel-Shading
- Realtime Texturing with Clip Studio Paint & Clip Studio Modeler
Various Useful Things to Know
This page isn't particularly about any "one" specific thing, but rather a bunch of small tips that otherwise don't have enough substance to them to really be their own page. This page will continue to be updated over time.
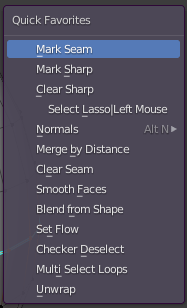
Use Quick Favorites!
Quick Favorites are incredible for shortcuts of any kind, and can speed up your workflow by a ton!
By default, Quick Favorites are bound to the 'Q' key, you can add to your quick favorites menu by right-clicking any button in basically any menu. You can remove options from your Quick Favorites by right-clicking them in the Quick Favorites menu to unassign them.
Personally in addition, I like to have my Quick Favorites button set to the extra side button on my mouse for extra convenience, I recommend it for you too if you have a side button on your mouse!

Local View
Local View is a feature of Blender that allows you to isolate and focus your currently selected object(s), this is much quicker than having to go individually hide other objects that are in your way! You can click '/' on your keyboard with a selected object to enter and exit Local View.
Viewing Textures in Solid Mode
If you're working on textures in Blender and need to see if it looks right, you may be annoyed with having to adjust each material to remove the specular from it where there doesn't need be. Well, do I have a good tip for you! There is two ways to go about this, you can just go into the viewport settings of material mode and change the render pass to "diffuse only" or whatever you need, but I personally prefer my method because it gives me a bit more control.
Note: You need to have your diffuse texture node selected in the material's shader editor, whichever texture node is selected in the shader editor is the one that will be displayed in solid mode!
How to Import Addons for Dummies
Step 1. Download the addon
I recommend CATS as it has plenty of tools to use for creating avatars for VRChat.
Once you have the addon downloaded, it should typically be in a .zip file.
Do not unzip/extract the file or it may not work!
Step 2. Open Add-ons
In Blender, at the very top left of the window click "Edit" then "Preferences" click "Add-ons" in the new window.
Step 3. Actually Import and Enable It
Click "Import" in the top right of the window next to "Refresh" and select the addon .zip you downloaded. It may take a moment.
Once you have imported the add-on click the searchbar in the window and search the name of the addon, then click on the checkbox to enable it. You may have to restart Blender in some cases to ensure it works properly. Please remember to read the documentation of the add-ons to find out how to use it.
Saving Startup Files
Are you tired of having to delete the default Blender objects when making a new .blend file? Do you like having Active Zero Weight on but hate having to turn it on each time?
Look no further because Blender has a button for that!
First, you're going to create a new .blend file of course, then set up all your settings exactly how you want them, any changes you want to make without having to go through and change them each time.
Then go to File>Defaults>Save Startup File!

Now whenever you create a new .blend file in Blender, it'll automatically open with whatever settings you have turned on in that saved startup file!
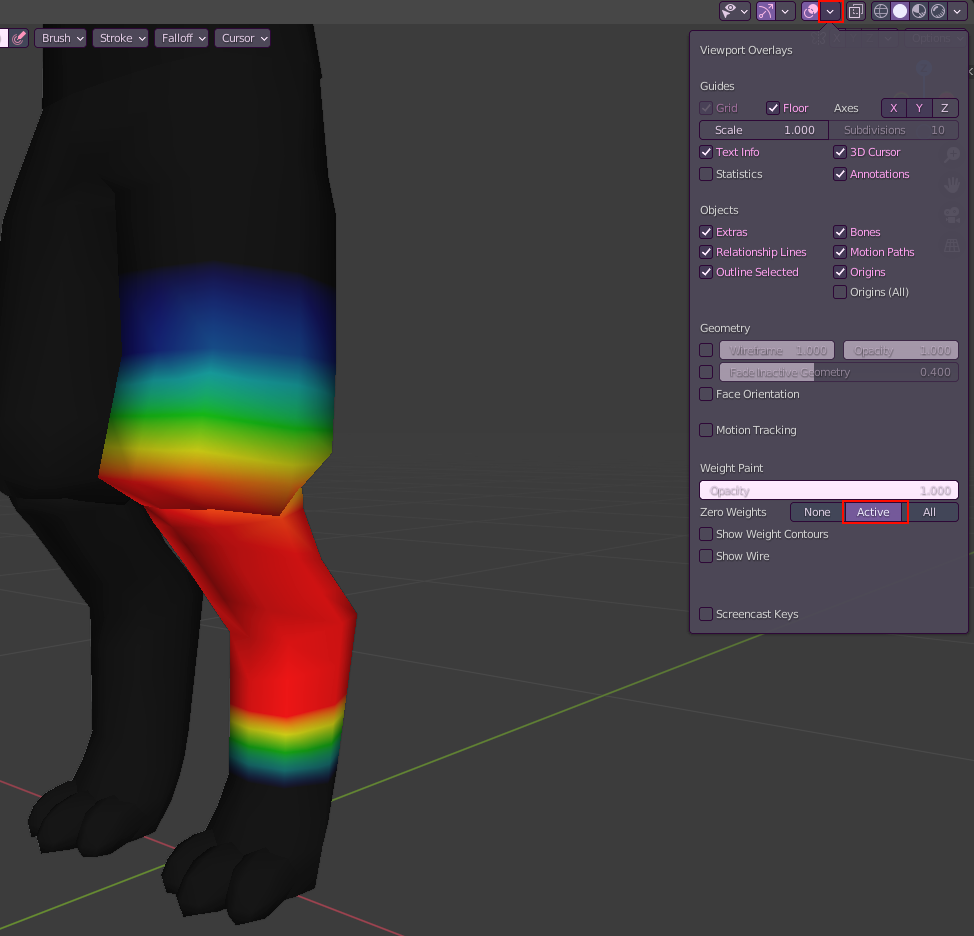
Weight painting: Active Zero Weight Overlay
When weightpainting, everything that isn't weighted will be represented by blue, unfortunately this can cause issues as some parts will be ever so slightly weighted and hard to see. You can turn on "Zero Weights > Active" in the Viewport Overlays to turn all zeroweight to be black instead, improving workability.
Texture Painting External Projections
In Blender, there's this pretty nifty feature that I quite literally learned about 10 minutes ago before writing this.
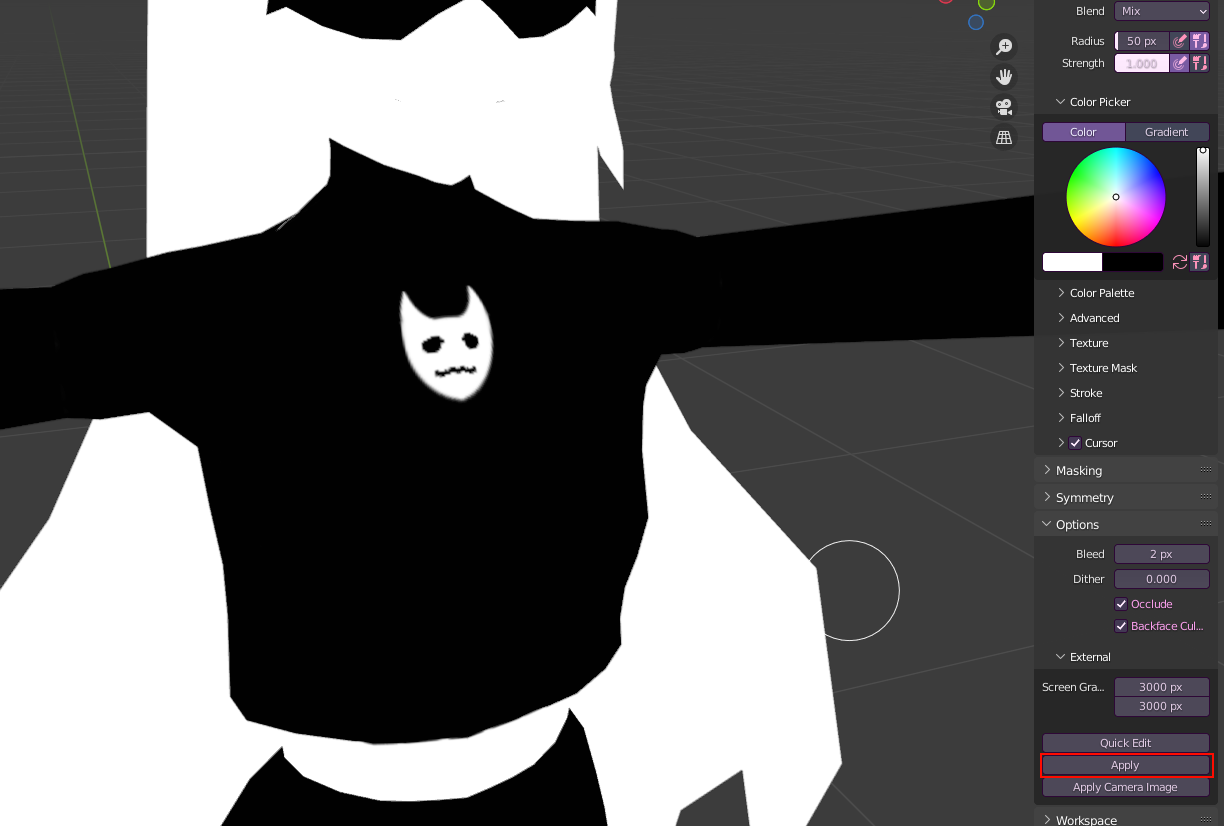
In Texture Paint mode, under the Tools tab, at the bottom under Options, there's an "External" tab with a few options. This right here will take a snapshot of your current view in your 3D Viewport and open it in your selected image editing software.
"How do I tell Blender which Image Editor to open?"
If you do not have an external image editor selected in Blender, go to your Preferences>File Paths>Applications and select the .exe of your preferred image editor.


I'm using Clip Studio Paint for this, however any image editor should work.
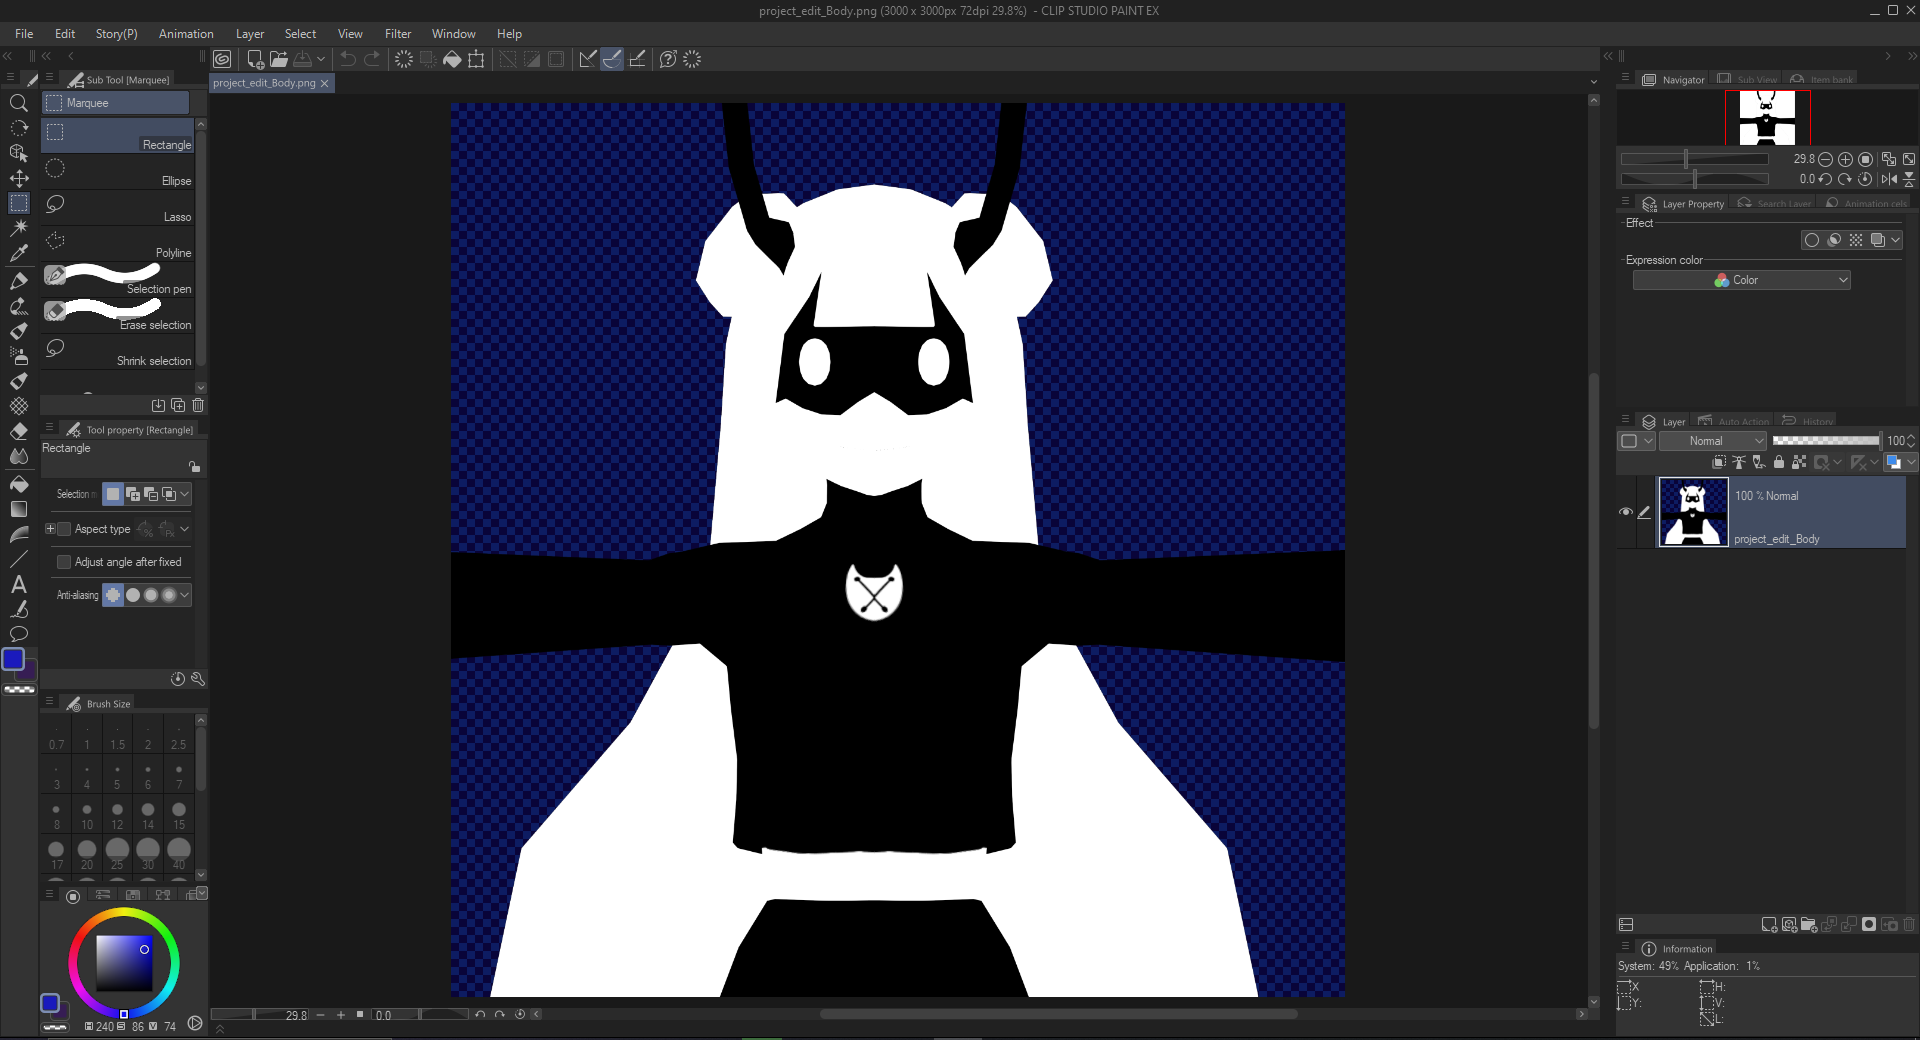
From here you can draw on top of the image project however you like, once you're done, save the image.
Overwrite the existing image or it won't work!
Once done, you hit "Apply" in Blender and the projection will be applied to your model!
Although be warned the lower res your texture is the worse quality it'll come out. I reccommend segmenting the part you're working on like so to minimalize potential issues.
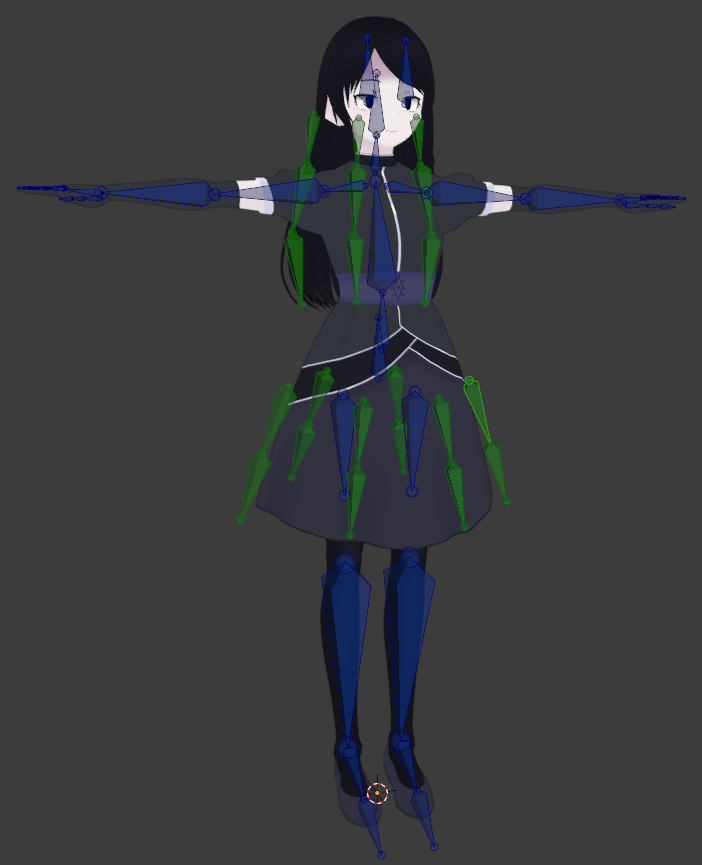
Armature/Rigging: Bone Groups
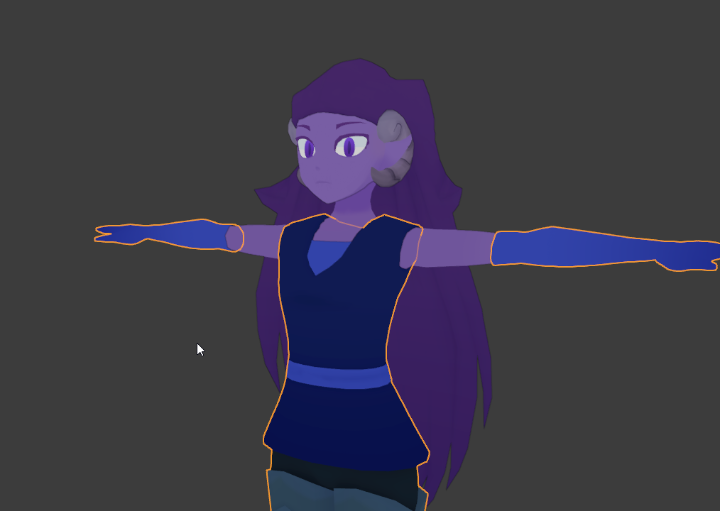
In Pose Mode you can create color coded groups of bones to easily make selections and make it easier visually to distinguish bones!
I highly recommend making sure that you keep your model in a .blend file to work on separate from the .FBX! It can help in preventing screw-ups and losing progress. Bone Groups won't be saved when exported and re-imported to Blender.
This can be done in Pose Mode by going to Armature and going to Bone Groups
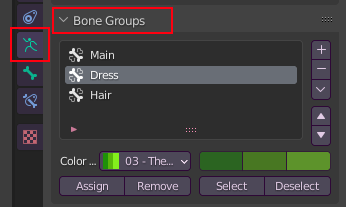
Here you can create/remove new bone groups by clicking the + or - to assign a set of bones to a group, select all the bones you want, and click Assign with the group you want them added to highlighted. Typically, I keep the main rig that VRChat uses in one bone group, and group bones by what they're for. It makes it easier for editing and selecting a bunch of bones at once by selecting Select.
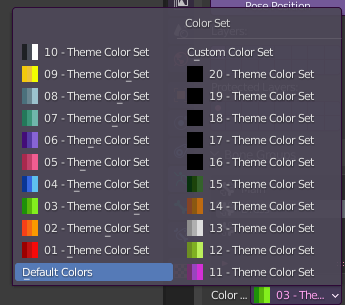
You can also assign colors by clicking the color dropdown and choosing whichever color set you like the most. You can also choose Custom Color Set to create your own preferred colors.
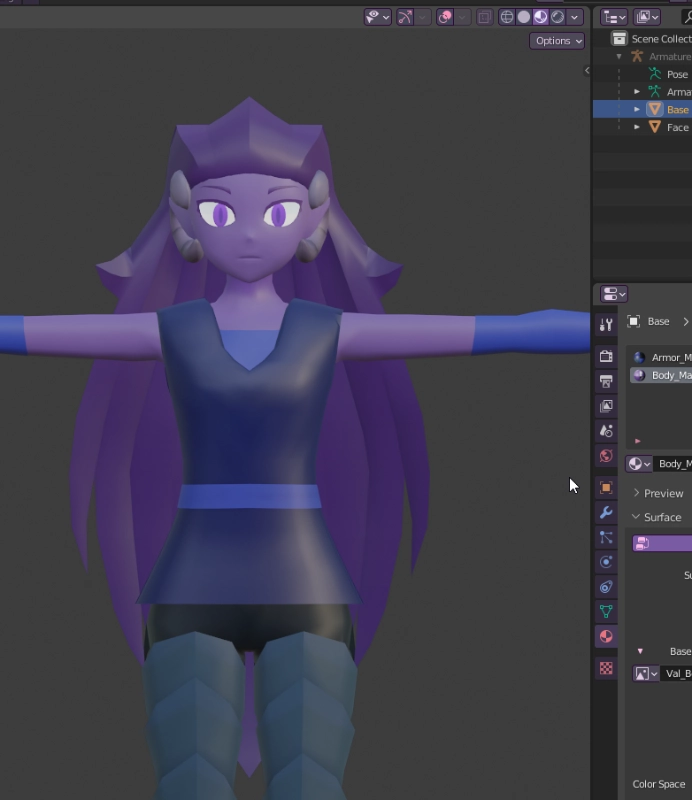
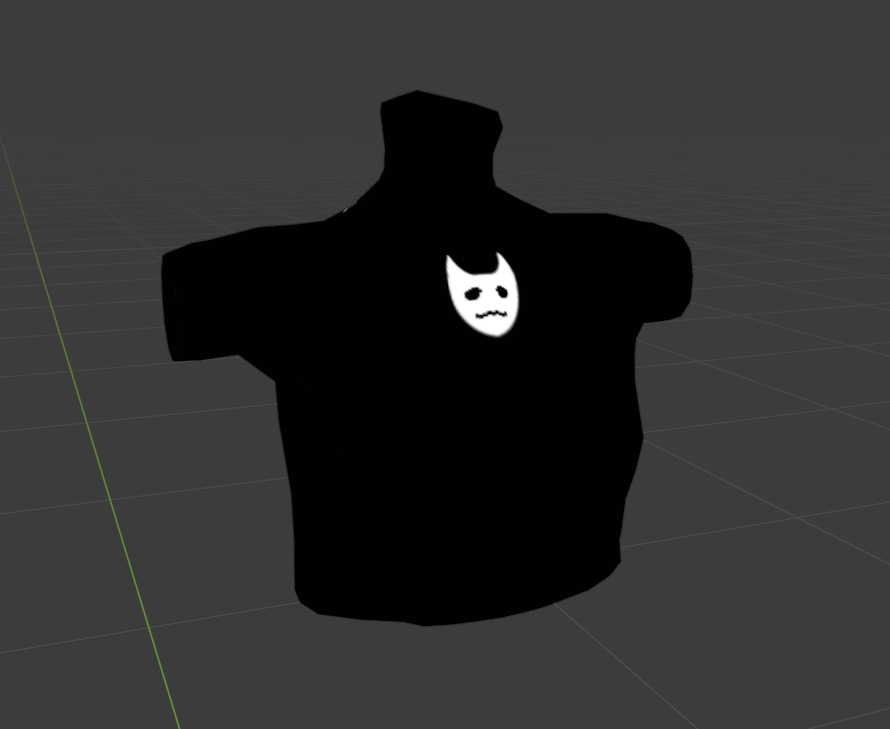
Normals: Data Transfer Normals for Cel-Shading
Ever wondered how to get good looking shadows on your anime face? Well, look no further!
This is the "lazy" way of doing this. Doing it manually can look better, but it's good to use this as a basis if you plan to do it manually!

In 3D models, shadows are controlled by a mystical system called "normals" basically, each vert has a direction it points that tells it how shadows should look when cast on it. Below, we can see the normal directions of the top two models. The pink lines indicate where the shadows will "connect" if that makes sense?
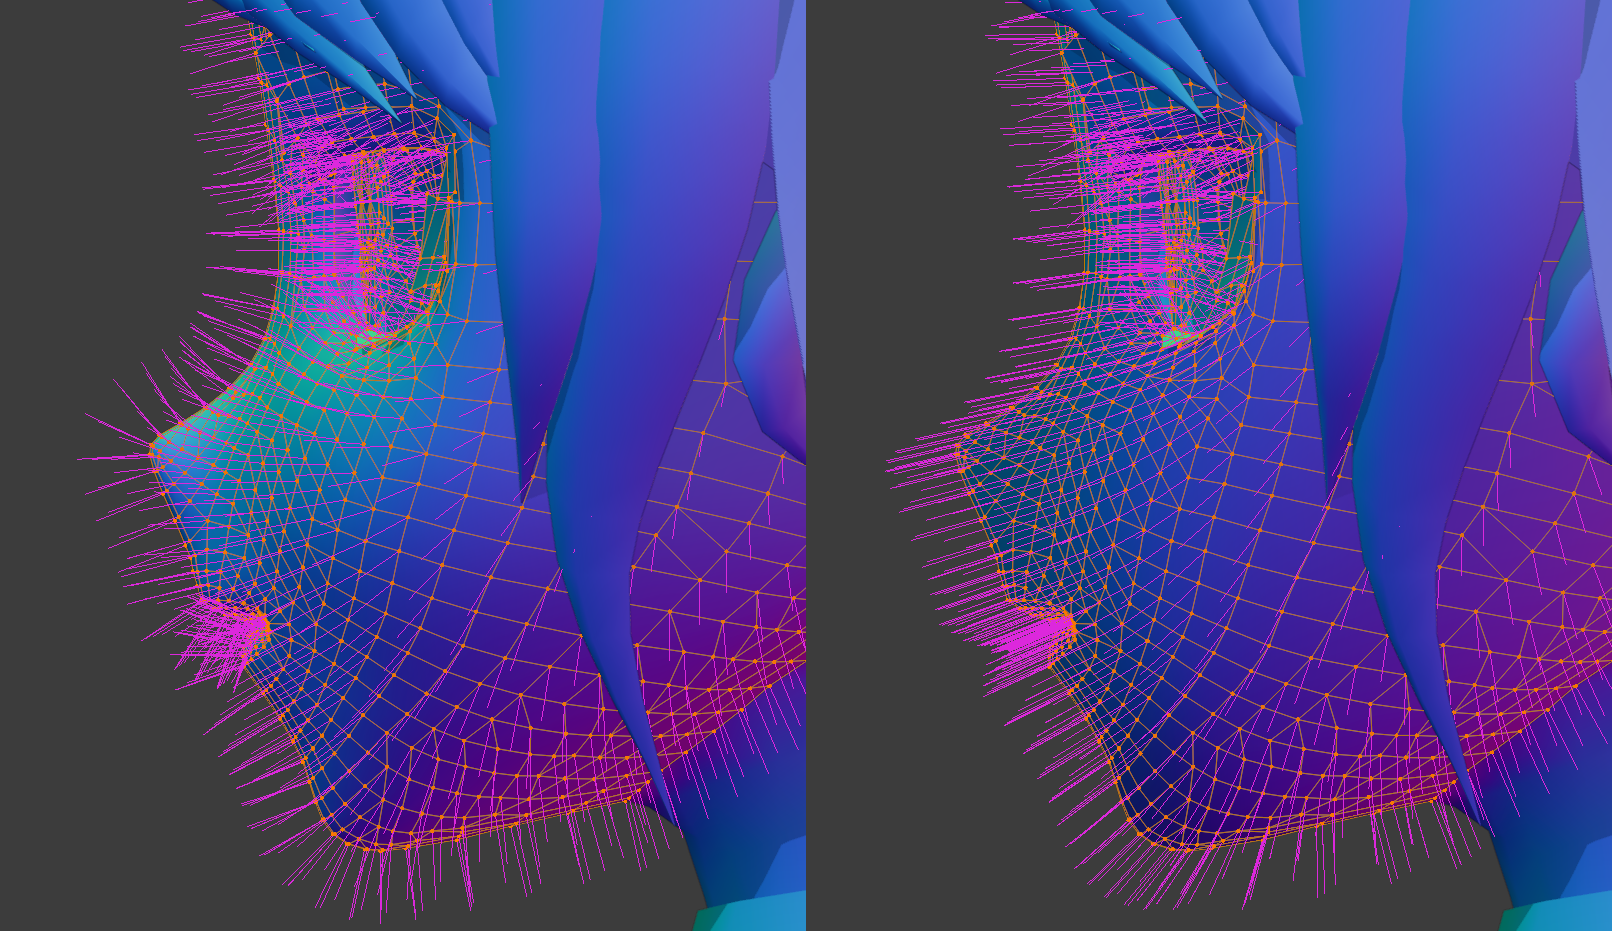
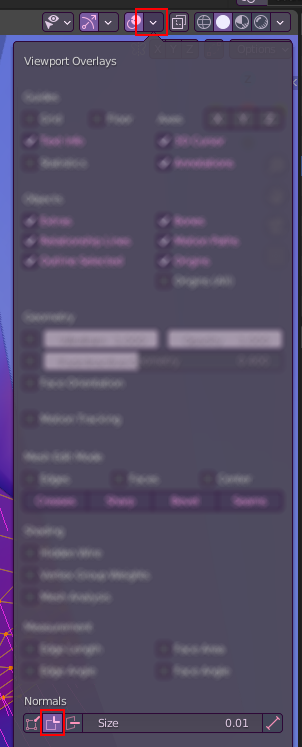
You can view the normals on your model via the following settings shown before.
The Actual Meat of This Page
So how do we make our shadows look a bit nicer?
Firstly you'll want to use a matcap such as the one I've been using to see how your normals will look, I suggest playing around with it as you go along so you can get it exactly right!

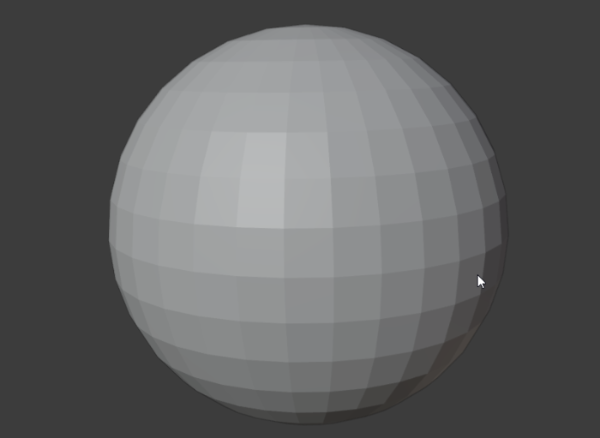
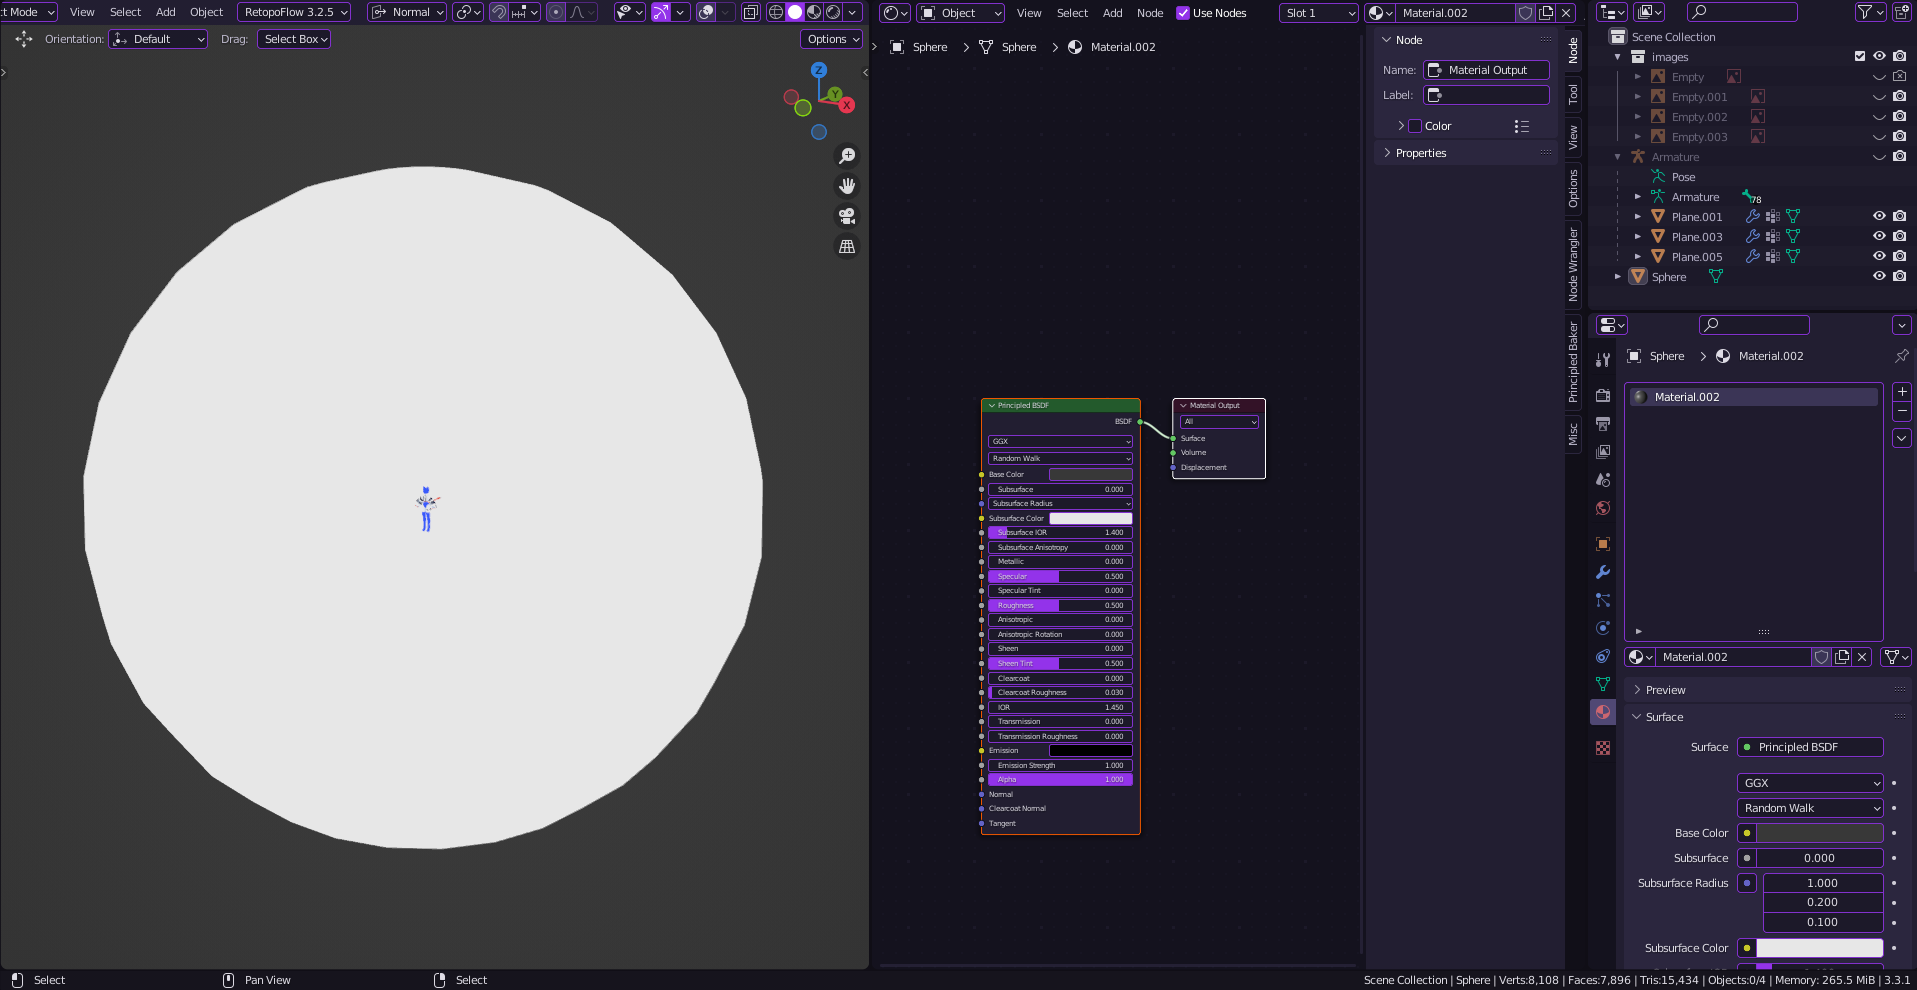
Step 1. Make a Cube, Give it a Subdivision Modifier
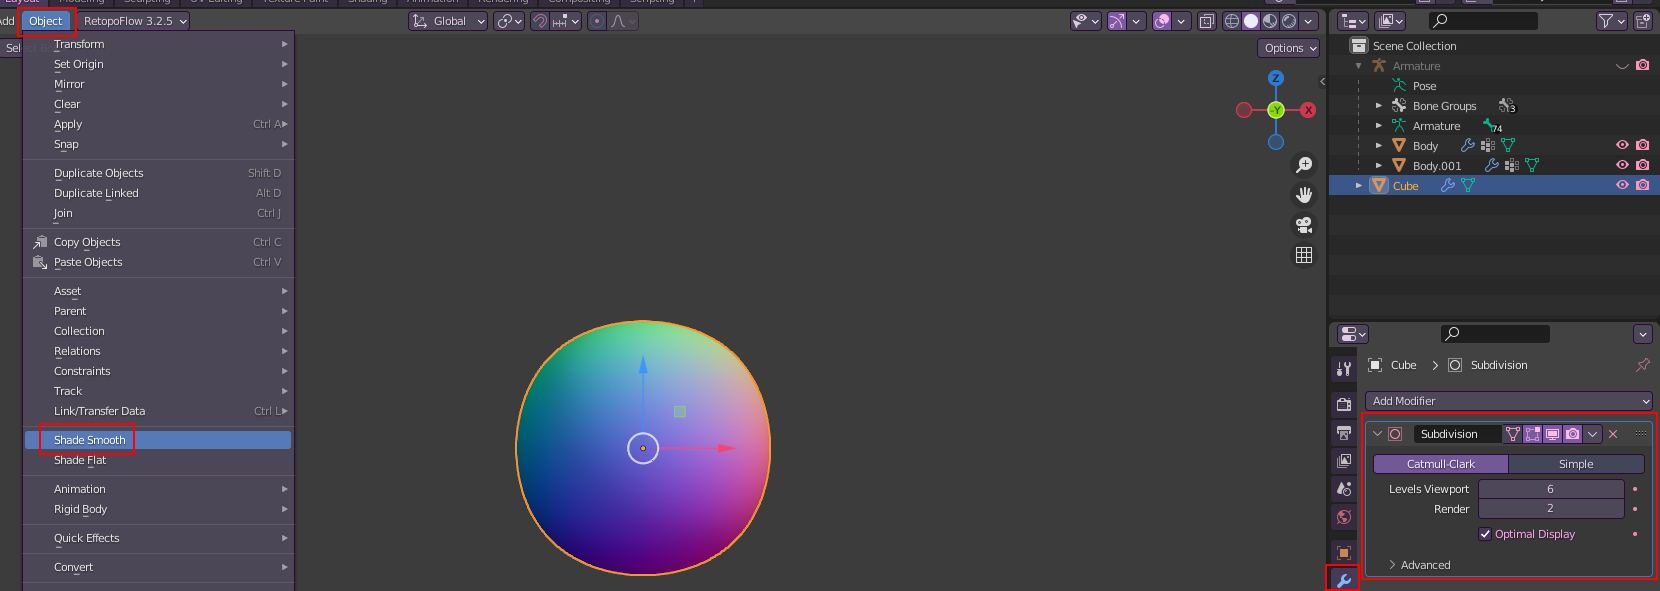
This is what we'll be using to project our shadows onto our model.

Place it over the mesh you will be adjusting the normals of, in this case, the head! Make sure it completely encompasses it.
Step 2. Add a Data Transfer Modifier to Your Mesh
You can hide your "Cube" for this step, don't delete it yet!
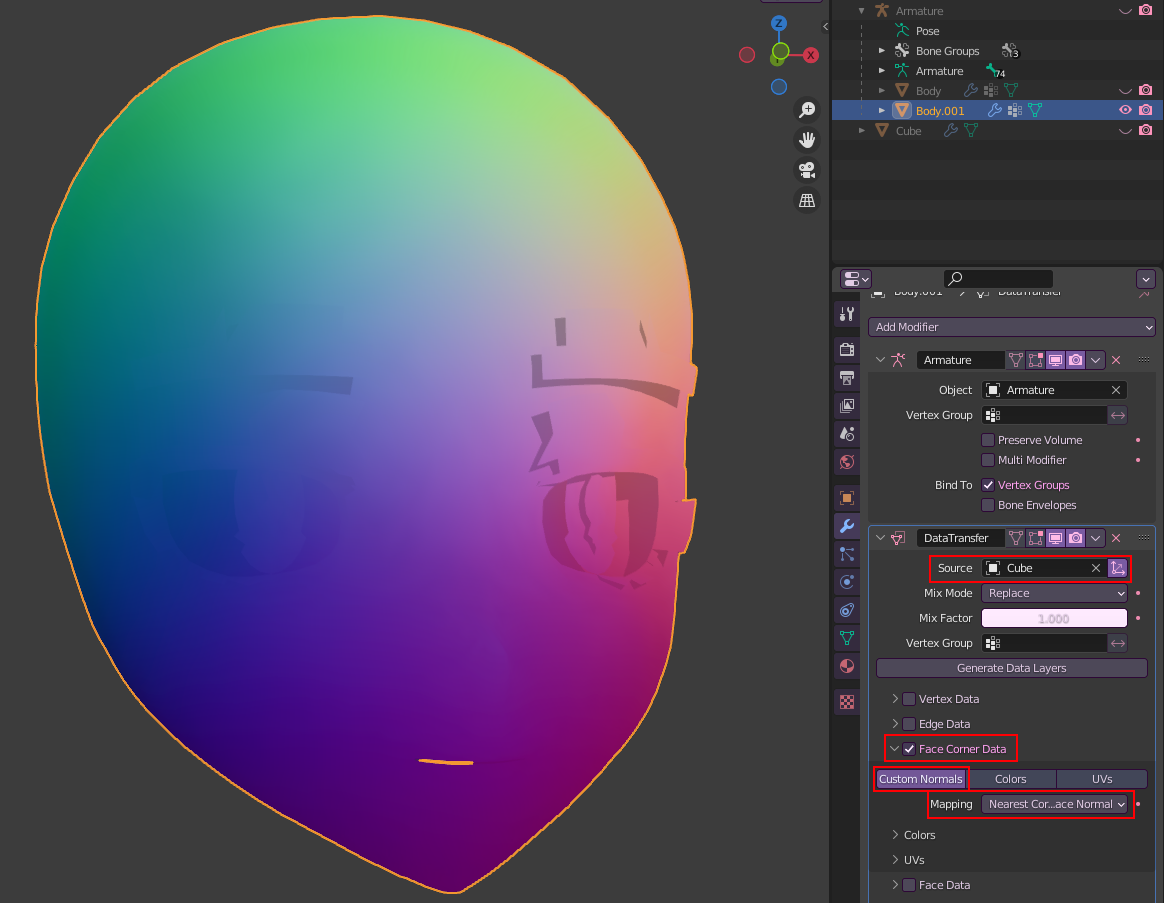
Add your "Cube" as your Source, then turn on Face Corner Data then click Custom Normals then change Mapping to Nearest Corner and Best Matching Face Normal
As you can see, our face is looking a bit odd! This has adjusted how our shadows will look. I personally find this to be a bit much though, so I often mess with the Mix Factor to get a balance of smooth and defines the lines of the face.
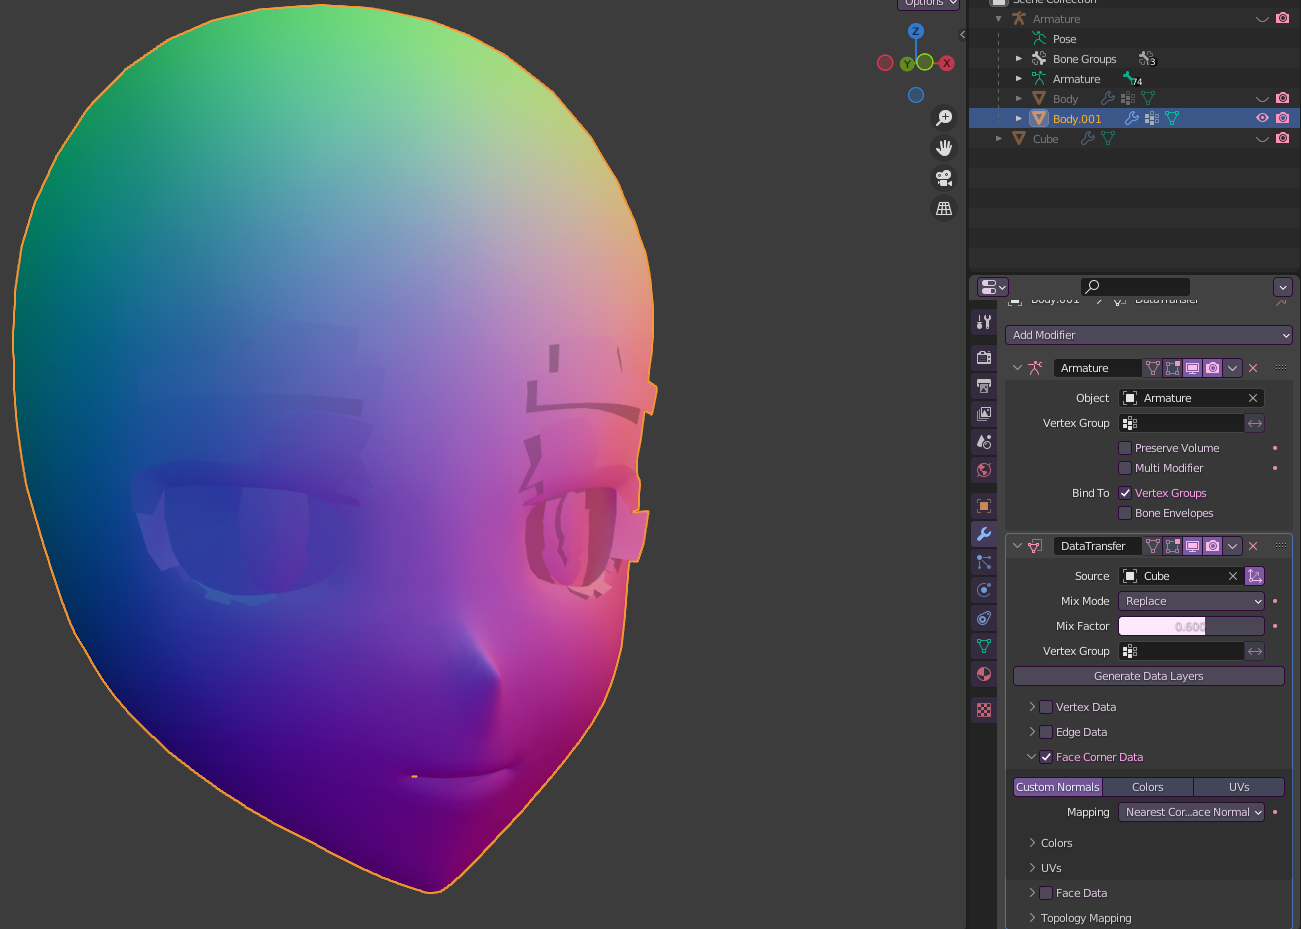
I often go for 0.6-0.8 for mixing, it gives a good balance between the smoothness I'm looking for while keeping defining features such as the mouth and nose.
Step 3. Apply the Modifier and Export!
MAKE SURE YOU DELETE THE CUBE! OR YOU MAY ACCIDENTALLY EXPORT IT WITH THE MODEL AND HAVE AN EXTRA 49,152 TRIS!

Tada! Look how much better that looks! You can use this for more than just faces too! I use it for hair as well for a smoother look, I adjust and extrude the cube so that it fits the entire hair mesh, then do the same thing.
Realtime Texturing with Clip Studio Paint & Clip Studio Modeler
This one isn't mainly about Blender, however, if you own Clip Studio Paint, you can use an app that comes with Clip Studio to texture in (mostly) real-time.
There are many pros & cons to this method of texturing things. Which I'll list below:
Pros
- Easier to iterate on textures without reloading it repeatedly in Blender.
- Access to the complete tools of Clip Studio Paint when texturing, including but not limited to:
- Layers
- Brushes
- Image Materials
- Much more.
Cons
- Clip Studio Modeler does not have any other interface theme besides light mode (why??? Celsys please)
Besides being sore on the eyes, this also can heavily affect the way you color your textures due to color relativity.*
- Clip Studio Modeler can be janky to work with in some cases.
- You are not able to draw directly onto the model.
*You can use a large sphere with inverted normals to change the background color when texture painting.

While it isn't exactly a replacement for Substance or similar programs, it's great if you're unable to use them for one reason or another, or you prefer working in Clip Studio.
The Actual Guide
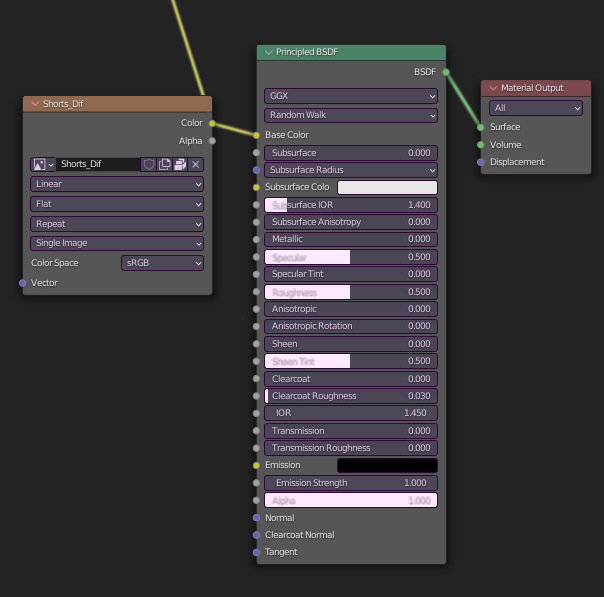
For this to work, you must have a particular material setup in Blender, Clip Studio Modeler is very picky about this. Luckily for us, it's just the default settings for new materials. You need the texture you're working on inputting into the Base Color of a Principled BSDF shader, this is important or CSModeler will NOT recognize your texture.
Once your materials have been set up properly, you can export the mesh into a folder.
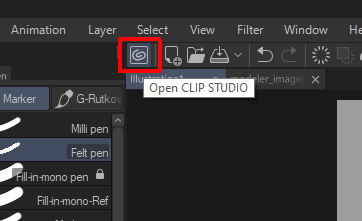
Now let's open Clip Studio Modeler, you can open CSModeler by clicking the "Open Clip Studio" button in the top left of Clip Studio Paint
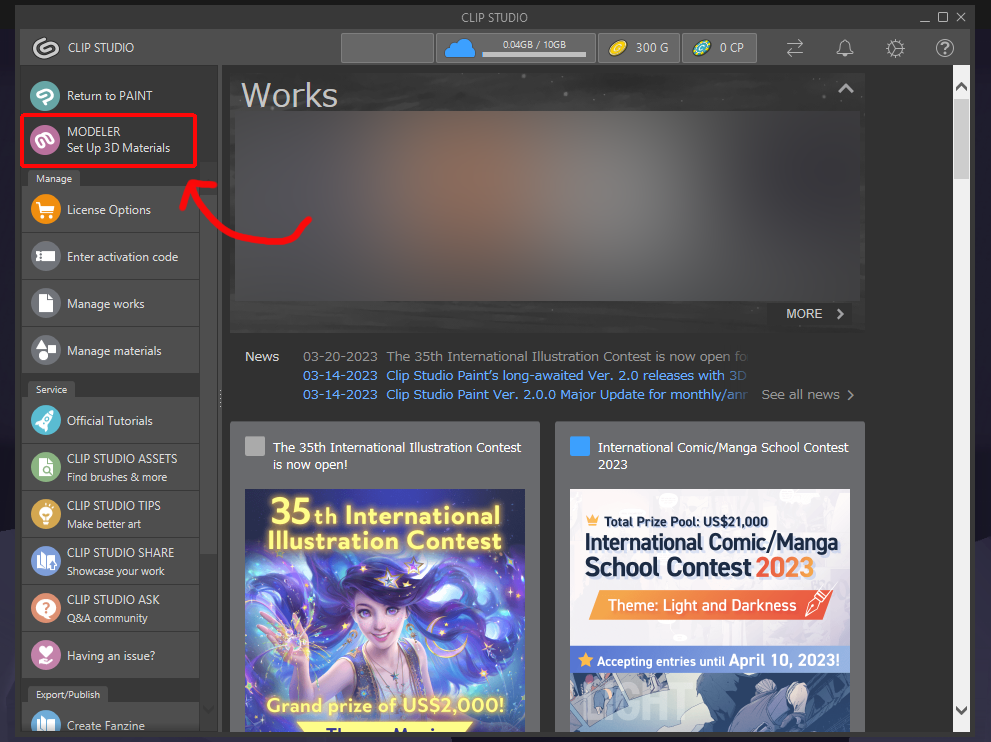
Once the Clip Studio window opens, click "MODELER" in the top left corner. If this option does not show up, you may need to download the program from Clip Studio's website first.
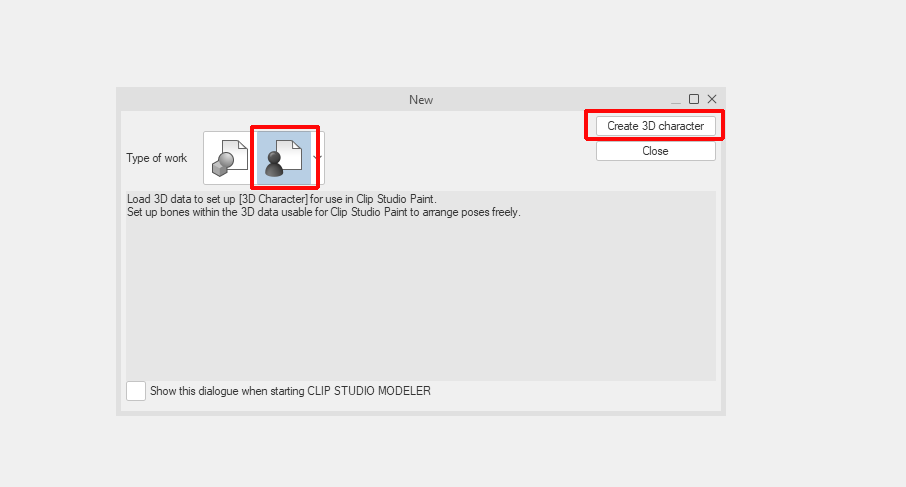
Once CSModeler opens, select "3D Character" and then click "Create 3D character"
Even if your model is not a character/avatar or such, select 3D Character anyway, as otherwise you will not be able to use the realtime texturing.
Once you've created the 3D Character file, on the right set of panels under the Character configuration window, click the "Body" tab on the top, and then click "Add from file" at the bottom, select your model from the file explorer prompt to open it.
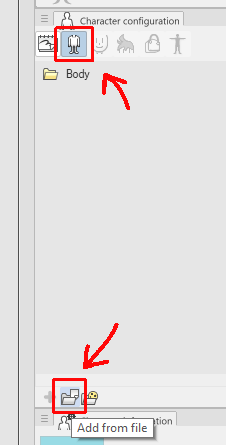
Your model should now show up in the main viewport, it should have its texture applied to it from Blender, if it is untextured, make sure you followed every step and that your texture is saved externally outside of the .blend file.
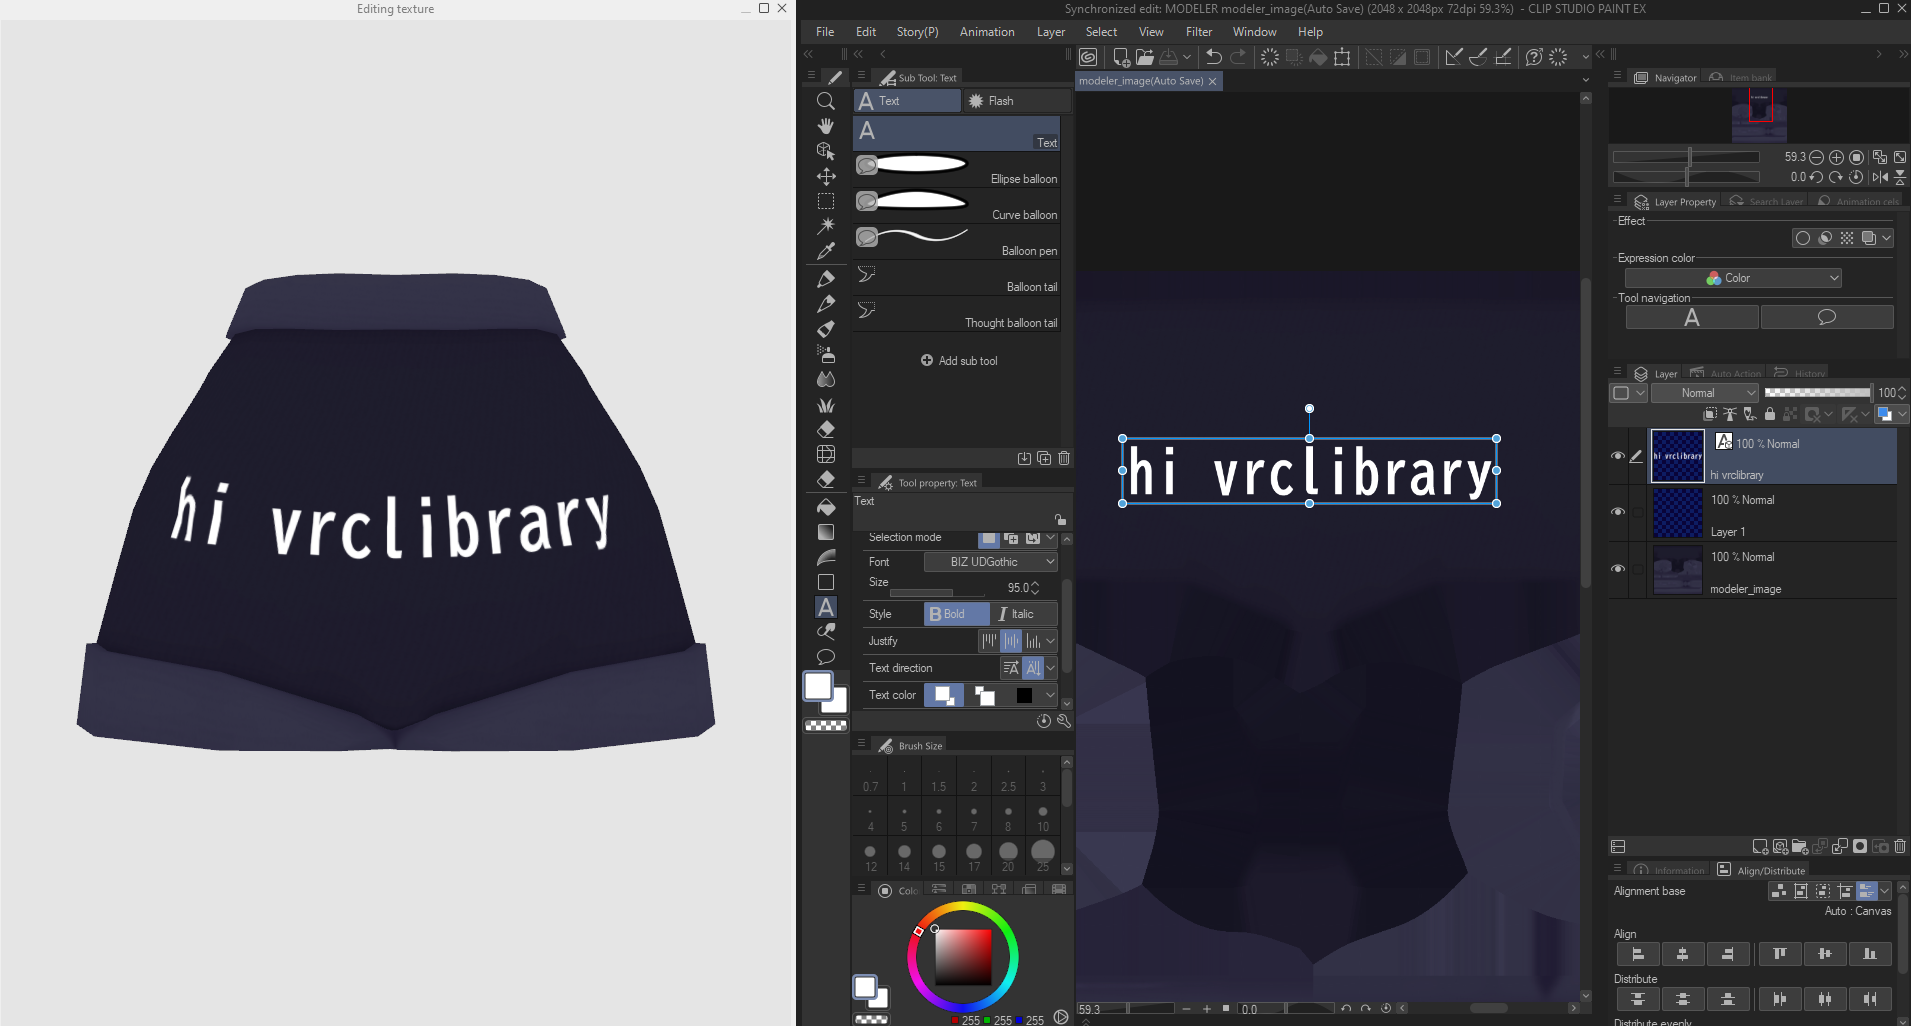
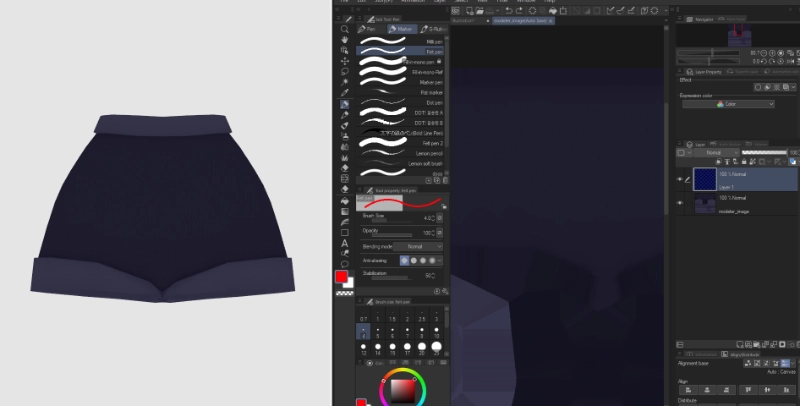
Once your model is loaded and ready, open the folders in the Body tab, and go to the "Surface material information" folder and select the texture you wish to edit, then click the "Edit with PAINT" button at the very bottom of the screen under the "Character information" window.

A new window called "Editing Texture" will now open and the texture will also open in CSPaint, you can now texture it however you wish as you would with any other image in CSPaint! Make sure to remember to save when you're done. I'd recommend putting the Editing Texture window on a second monitor if you have one.